Today we returned to the American Revolution (AWI) as requested by Roderick, I believe?
( I didn't let on, but I was having an acephalgic migraine during the game, which meant I was not really on top form)
It was his first game using my rules, and I got him as my fellow Rebel player.
Lawrence as ever used the Hessians, and Phil the British.
For once, I outrolled Phil, and the Americans had the initiative and even got to deploy in the flank sectors of the table, we will see if it helped get another Victory for George Washington (Last game)
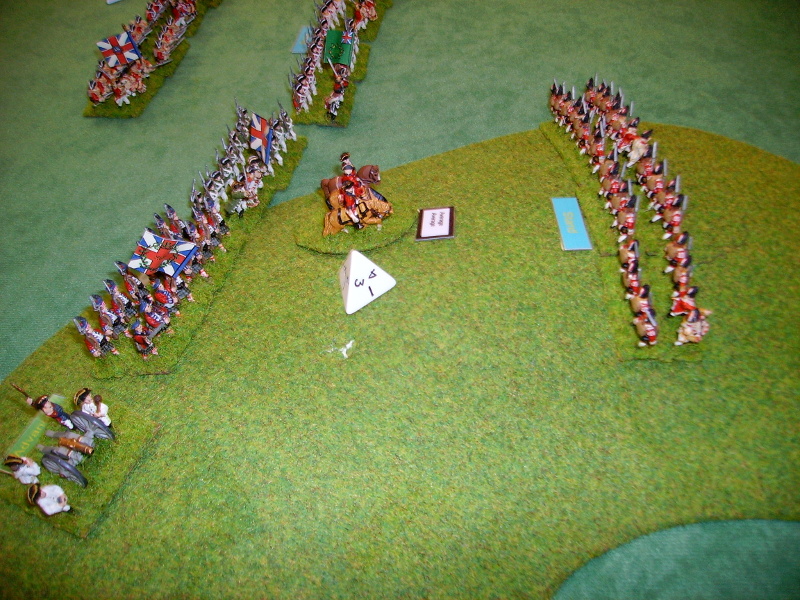
I deployed on the American right, with most of my Light Infantry and the 2nd Continental Light Dragoons supporting my New Jersey and Virginia Continentals.

To the left of the Virginians, Roderick placed his Marylanders...supported by Militia.

More Continentals formed our left, mostly Independent regiments, and State Troops

Opposite me, Lawrence placed his Hessians.

This left Phil with the British facing Roderick.

Lawrence got his Feldjägerkorps moving into the rough terrain on his left.

Phil got his infantry centre moving, and expanded his line right with his excellent British Light Infantry and the 17th Light Dragoons.

Significantly, Phil got his British Grenadiers on the hill to his front.
I threw two '1's on my 2 D4s for command in the first 2 turns of the game, and it was only my having Mr Washington that allowed my front line to advance.

Having no space to deploy my Artillery, I moved it to try and support Roderick, a difficult task at any time.

Roderick got two regiments, the German Battalion and the Pennsylvania State Troops to face the Grenadiers on the hill.

These troops advanced and fired, causing heavy losses on the redcoats.

Roderick got the rest of his infantry advancing by turn 2, though they were outnumbered by the British opposite them.

The British Grenadiers, unfazed by the rebel fire, stepped forward and blasted the Continentals.

Hardly surprisingly, the poor Americans retreated off the hill.

In the centre, the Marylanders came under a withering fire.

Here too, the front line retired. (Yep, rubbish dice all round!)

On the right, My Virginians began turning the flank of the British line.

One advantage (!) of losing his front line was Roderick's artillery got to play...

...More of those cursed Grenadiers were killed.

On my wing, my New Jerseymen engaged the Hessian Grenadiers...

...these stepped forward and blasted my men.

In the centre, the brave Marylanders were fighting on despite being outnumbered.

The British regiments were taking losses too.

My Continentals survived the Hessian's volley and fired back effectively.

STILL, the Maryland regiments held the line.

A crashing volley from the New Jerseys cut down almost all the Hessian Grenadiers, but the last stand STILL refused to rout!

On my right, my Light infantry had refused to advance, so Sheldon's horse advanced and attacked the Hessian lights, one Battalion routed before the charge, the other fell back and was caught!

The brave Feldjägers fought back bravely...

...but were cut down...

...to a man!

The last company of Hessian Grenadiers still fought on!!!

On the other wing, the British Grenadiers advanced off the hill...

The centre saw the 2nd Maryland State regiment fall, leaving the 'Dandy' 5th alone.

On my right, the Virginians came up to support the New Jerseys, who couldn't finish off that last stand however hard they tried!

Roderick on the far left tried to use a Continental regiment to fend off the mass of British Light Infantry.

His Light Infantry were ridden down by Light Dragoons...

...the survivors fled. (Phil forgot the 17th should have pursued them!)

At this point we called it a day as we had run out of steam, on my wing, the inactivity of my lights stymied my flanking move and my reserves couldn't be brought into play against the Hessians.

Our left was in tatters, but still held.

Fun game as ever, though, and Roderick did pretty well for his first game!
I live just outside Hexham but am downsizing and moving to Jesmond. I've had a variety of Wargames figures in the loft for the last 30 years and I'm looking for a good home for them.
ReplyDeleteI don't want anything for them and they will need a bit of TLC. Mainly 25mm ancient figures but also a few Napoleonic and also some 15mm ACW.
Hi there, I know how difficult it is getting rid of old figures, I don't know what to advise. Most club players have lead/plastic mountains themselves so are unlikely to want more. Perhaps contacting graham's wuerkshoppe (just google the name) is your best bet, you might get a little for them too!
DeleteGood luck anyway!