Welcome!

Welcome to the Blog of a Skirmish wargamer! I hope you enjoy reading it!


All my rule sets are freely downloadable from our club website's Downloads page


If you need to contact me my E-Mail address is richardbradley5@gmail.com


Saturday 29 July 2023

A first try at Lion Rampant.

 Today, we had a game of Lion Rampart with our Viking figures, My Cloth, and Lawrence's terrain!

I had never played it before, and neither had Rod, who was playing with Phil against Lawrence and myself.


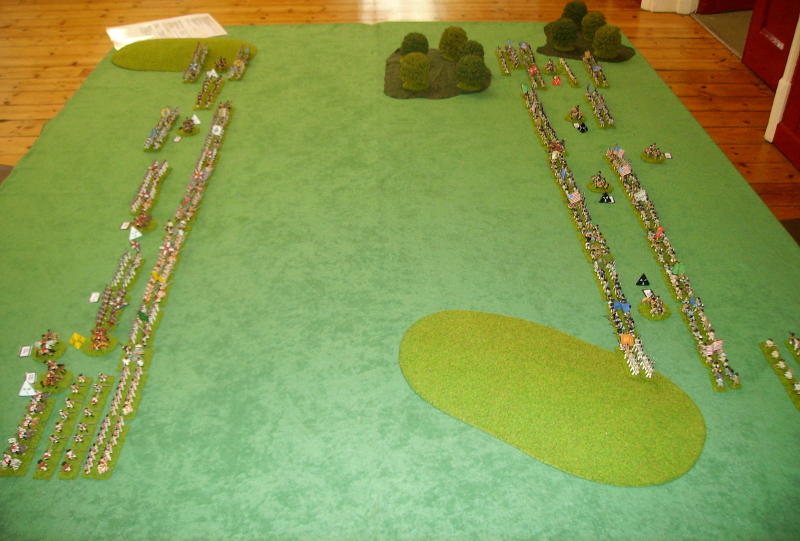
The terrain for today's game.
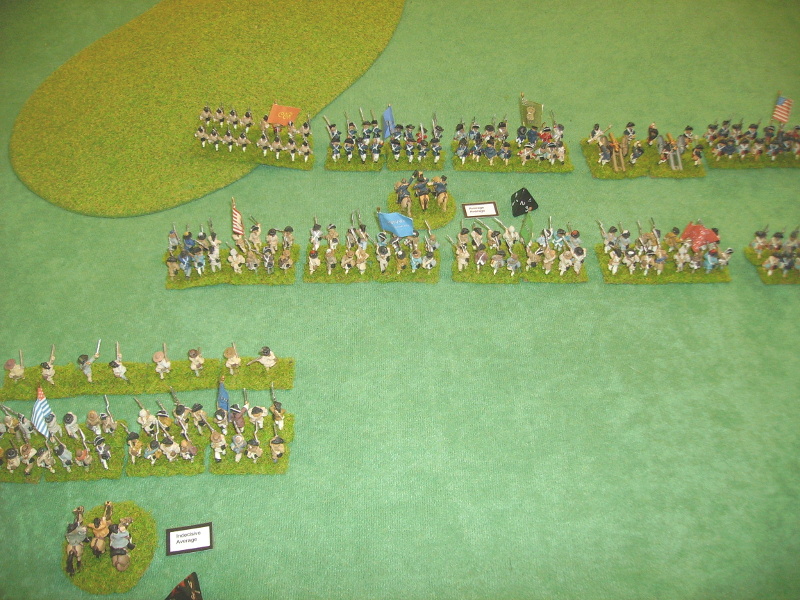
We had to deploy in a narrow corner each (only later did we find the units should have started off table which were within 3"!) These were mine.
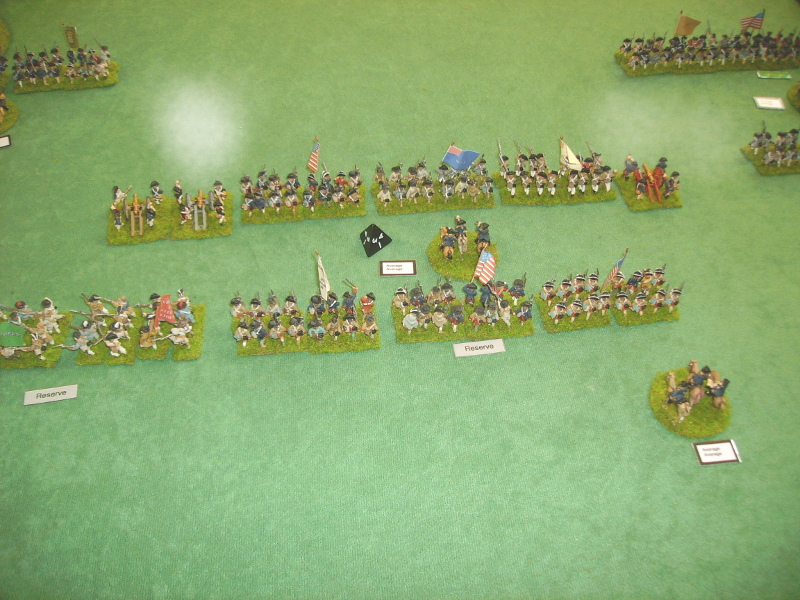
Phil, opposite me with his nicely painted horde!
Lawrence was in the other corner from me...
...and Rod opposite him.
Phil started, getting his men advancing into a wood, mostly.
I had a lot of skirmishers, who lead my advance, 2 of my units failed to activate.
Rod had similar activation problems to me, but got a fair number moving towards Lawrence's force.
Lawrence moved forward to meet him.
Phil sent his skirmishers into the wood, flanked by 2 units of Elites.
His Warriors moved to take a hill in the centre.
Rod seemed keen to get his Vikings' feet wet...
Lawrence was now advancing on a broad front.
I had most of my men moving now too, except for my leader!!!
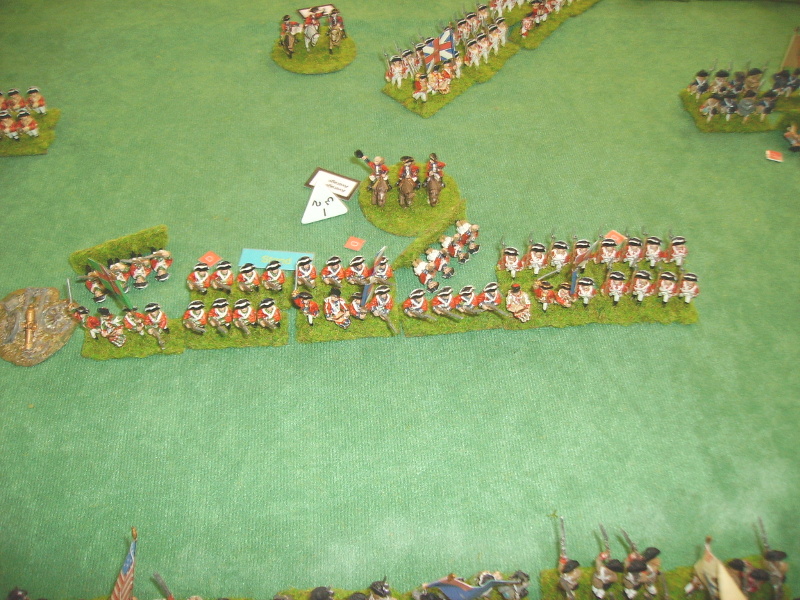
Phil set up a strong defence, I was not stupid enough to attack!
He moved some Heavy infantry to support his Warriors.
The Warriors looked down on their opponents!
Having seized the swamp, Rod expanded into the centre too.
Lawrence moved his men into a wood trying to outflank Rod.
Rod decided to stand and await Lawrence!
I had deviated toward the centre, leaving Phil's skirmishers out of range, so he sent his Elites forward instead.
I was pleased one of the Elites refused to move forward!
Screened by my Skirmishers, I moved right towards the settlement.
Lawrence launched an attack from his hill towards the swamp dwellers.
Rod moved forward to counter as expected.
Rod's and Lawrence's Warriors meved toward a battle, but Rod's Skirmishers killed one of Lawrence's Warriors, and the rest fled (I didn't even have time to get a picture of them!!!)
Phil advanced one of his Skirmisher units from the wood. My men shot one of them, but they shrugged it off. They shot back, and killed one of my men!
Of course my men retreated rather battered! (Apparently even having twice Phil's numbers of Skirmishers isn't enough!)
Rod an Lawrence decided to fight a personal duel! - what could go wrong?
Ah!
My Skirmishers finally killed a couple of Phil's men, and they retreated.
Yay!
Phil brought his second Skirmisher unit forward... 
...and my second unit fell back too!
Lawrence charged a Warrior unit into the marsh.
Both sides fell back with casualties.
Lawrence was getting the worst of a melee between their heavies.
Desopite some dawdling, my infantry finally got moving towards the settlement.
Phil didn't seem keen to come off that hill!
Rod brought his full strength against Lawrence.
Lawrence brought forward his last reserve.
Phil charged his men into the Settlement, and hit my Skirmishers who failed to evade (of course!)
It was at this point that we decided to break off.
Rod was detaching a Heavy unit to support Phil.
Phil was advancing and as we have seen was already in the settlement.
Rod outnumbered Lawrence, who had lost heavily in the melees, and had lost their commander.
Ah well!

So that was the end of that!

I think next game we will stop having to keep units 3" away from each other (and go to 1". I am glad we were not using the 'one fail and activation ends and goes to the opposition' rule, which loke several things in these rules I found a little odd.

It is a fun game and very quick to pick up, and I think it plays well as a fun game, but I don't think it reflects historical combat terribly well, but I don't think it tries to.

Saturday 15 July 2023

Another fine mess...

 Today, due to a misunderstanding (!) - we ended up playing AWI/American Revolution again.

This time, the British gained the Initiative, which allowed me to choose the side of the table to defend on, but they moved first!


I naturally chose the right in this picture, and deployed the best I could. The British got to place theirs opposite.

I put the mass of my Militia behind a line of Continentals on my left, hoping the hill would give me an advantage.
My Marylanders and New Jersey Continentals were in my Centre.
My right was all my Pennsylvanians with some Light Infantry and Light Dragoons.
Opposite these were Lawrence's Hessians.
As Ever, Phil was in command of the British, he had a strong centre. He put his Light troops on his right.
The British had no trouble advancing at the start of the game, and this brought them in range of my Heavy guns...
...At this range all I could do was disorder them, though!
Lawrence sent his Jägers forward to contest the woods, and marched his left wing infantry to the left of the table.
In their centre, the British Infantry outpaced the Hessians!
On their right, the Light Infantry and Dragoons moved out to outflank my line.
I got my left wing moving as hoped, but my centre refused to budge!...their guns were firing though and again disordered the British line.
Having seen the strong forces arrayed against them, I had advanced my Continentals to allow my Militia to expand out.
My centre was even prompted by Washington, but refused to advance!
The New Jerseys advanced in fine stye though.
On my right, even though I had put my best commander there, only my Light Dragoons and some Light Infantry moved!
I hoped my Dragoons might catch some juicy Jägers in the open! 
The British right couldn't stop me taking the hill first, but their first volley was devastating.
On my right, my Light infantry chased the Jägers off, but my Light Dragoons refused to charge them!!! 
My Men on the hill managed to fire over the British heads, causing no damage at all!!!
My New Jersey's, too, missed the Hessians facing them!
The Hessians didn't miss!
The only bright spot was my Lights taking the wood!
I finally got my Riflemen advancing to support the Militia, and I was slowly forming a coherent line to cover my flank.
The British were still slaughtering my Continentals, though the 2nd Canadians were holding against TWO battalions of Grenadiers!
The British pushed forward to short range, and my Marylanders began to buckle.
The New Jerseys, too, were losing badly.
The Continentals on the hill got a final volley into the British, and did some damage...at last!
My Marylanders damaged the British attacking them too...but it was all too little, too late.
The New Jerseys were still losing badly.
The British right was sweeping round, and I was not at all confident my Militia would hold against them.
The New Jerseys were being outflanked by the British second line, all thanks to the centre not advancing with the rest of my line!
Only my inert centre was intact!
There was no hope now for an American victory, and as Lawrence said after the game 'There was something wrong with the American powder today!'

So, Another defeat for the Rebels. My admiration for General Washington's performance with this 1776/7 army has grown from game to game.
I intend to try next time with a post Valley Forge army, to see if this makes a difference.
Nothing can help me with my dicing, of course!!!