Welcome!

Welcome to the Blog of a Skirmish wargamer! I hope you enjoy reading it!


All my rule sets are freely downloadable from our club website's Downloads page


If you need to contact me my E-Mail address is richardbradley5@gmail.com


Monday 30 January 2012

ACW skirmish rules playtest

This week, lacking Lawrence and his lovely hills and woods, we did the best we could and tried a first draft of my ACW skirmish rules...

The scenario involved a Union company of raw troops, covering a bridge, reacting to a Confederate company of Average troops moving to seize the bridge.


The Rebels advanced on a broad front.
 The company command, and 1 squad moved down the road.
 On the other side, the Union company moved down the road, using 1 squad in dispersed order as a screen.
 The company of Raw Ohio boys outnumbered the Virginians somewhat! 
 Phil, having spent two happy years in lovely Georgia, was keen to lead the Confederates! 
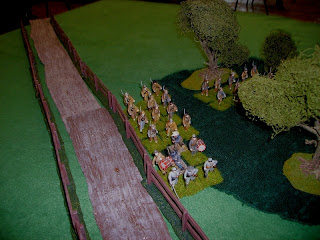
 Seeing the advancing 'Bluebellies', the rebs in the road hopped over the fence to take cover in the woods.
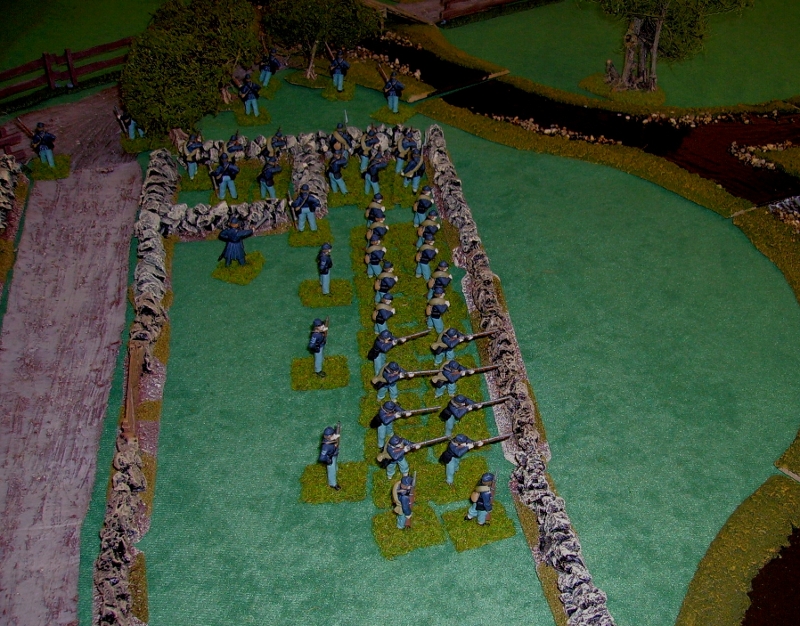
 The boys in blue reacted to the Confederate appearance by moving rapidly toward cover in some stone walled enclosures. 
 The second platoon moved towards the right to try and outflank the rebel positions.
 The Virginians took up positions in the woods.
 The 2dn platoon of Union troops waded across the stream to outflank the Rebs. 
 The Union 1st platoon reached the bridge frst. 
 ..not surprising! - the Rebs had chosen their battlefield and were waiting! 
 The union skirmishers checked warily down the road..
 ..while the rest of the men filled a stone enclosure facing the bridge.
 The 2nd Ohio platoon dispersed, looking for positions of advantage. 
 The first platoon waited hidden behind their walls.
 The captain ordered the lieutenant to wait for the 2nd platoon to act before he got engaged.
 half the 2nd platoon reached a convenient wood.
 2nd platoons lieutenant followed a squad towards a small hill overlooking the ford.
 ..leaving 1 squad to join 1st platoon in the enclosure.
 The 2nd platoon moved to occupy the edge of the wood.
 In a very 'Butch Cassidy' moment, the central squad breasted the hill and were blown away by accurate Minie rifle fire, taking 60% casualties!
The Union troops, realising the futility of further advances, fell back further into cover, leaving the field to the victorious Virginia boys!


As a game, it was quite enjoyable, but we all felt the rules need some modification in regards to shooting to make the game more playable!
All rules need to balance the sensation of reality with playability and enjoyment.
Have to make those Minie balls less deadly at longer range, methinks!

Ah, the joys of playtesting!!!

Players:

Phil - the Confederates
Ian and myself- the luckless Unionists!

All the figures (apart from 4 Dixon figures) are Perry Plastics, having their first outing in approx 2 years since I painted them!

Saturday 21 January 2012

Happy Birthday Alte Fritz!

On 24th January 2012, it is the 300th anniversary of the birth of Frederick the Great (Friedrich der Grosse).

It seemed a good idea to do a 7-years wargame to mark the event!

Both Prussian (left) and Russian forces (right) deployed in 2 lines, with cavalry on both wings.
The Russians were hampered by several woods in their deployment area
The Russian right was  2 full lines of infantry, with a battalion of dismounted dragoons and a combined grenadier battalion as reserve. 5 cavalry regiments deployed behind them.
 The Russian centre, having to cover a larger gap in the woods, deployed in 2 lines, but dangerously extended. A low hill on the left was guarded by light troops only.
 The Russian left was composed of a large force of Kuirassiers, Dragoons and light horse.
 Facing them, the Prussin right, was Kuirassiers, backed and supported by Infantry.
 The Prussian centre was 2 lines, backed by a heavy cavalry reserve.
 The Prussian left was good Prussian infantry backed and flanked by Kuirassier and Dragoon regiments. These were commanded by a guest player in our game, Paddy the Prussianophile!
 As the game got underway, despite the presence of some poor generals - the Russian right advanced, and the cavalry began to move into a wood on the extreme right.
Some Cossacks and Serbski hussars detached from the right wing cavalry began to filter onto some light woods on the centres right.
 ..This allowed the centre to advance relatively safely!
 The Russian cavalry moved wide on the left wing to outflank the Prussian right.
 The Prussian left was soon in contact with the Russian right.
 Both sides fed in new battalions to try to overwhelm their opponents.
 A fierce to and fro light cavalry battle occured when the Serbski hussars bumped into Prussian hussars coming the other way!
..In a very short time, only a weakened Serbski hussar and a single Prussian hussar unit remained!
 As the Russian centre advanced, the Prussian artillery fired innefectively.
 The cavalry on the Russian right tried to outflank the Prussian left wing. 
 As the Russian right wing fought the Prussians, the Prussian fire prevailed.
 On the other wing a Russian dragoon regiment nearly beat a Prussian Kuirassier regiment! - but did manage to shred it before the dragoons broke!
In the centre however, the Prussian infantry managed to break through the extended Russian centre, forcing the Russian army to withdraw from the field while they still had their horse intact!

Perhaps a fitting victory for Fredericks birthday!

More importantly, it was a good game!


Sunday 15 January 2012

Death in the marshes

Today's game was an ambush scenario in 16th century Japan.

A group of Samurai are leading a force of Ashigaru to a castle to join an army intending to attack the local Ikko-Ikki.
On their journey, they have to cross a small bridge crossing a marsh.

Suddenly - from all around, the cry 'Namu Amida Butsu' (Hail to Amida Buddha) erupts, as an Ikko-Ikki raiding force, which has been waiting in ambush, breaks cover....

The Samurai march innocently towards the bridge..
..From all around, fierce Warrior monks and their adherants appear! 
Another party appears on the far side of the bridge... 
..and another on the other flank! 
 On the hill overlooking the bridge, dozens more advance.
 This force splits to attack either side of the bridge.
 At the front of the column, Yumi and Tippo armed Ikko-Ikki close to lethal range.
 Yama-Bushi attack from the other side.
The lightly equipped Samurai at the front run forward to escape the jaws of death!
 At the rear of the column, the Samurai must react hastily!
..and form a makeshift defensive line.... 
- calling as many men from the bridge to support them as they can! 
 A line of Sohei closes on the line. 
 The Samurai on the bridge come under fire.
..but only one man is lightly wounded. 
 The Ikko-Ikki at the column rear begin to make contact and disrupt the defensive line.
 At the column front, the Samurai, having drawn off a third of the ambushing force, turns and prepares to sell his life dearly.
 A small group of missile troops turns behind the house, rapidly loading.
 As the Sohei approach the line at the rear, the Tippo men fire to little effect.
 Nearer the bridge, the Ikko-Ikki are already fighting ferociously. 
 At the very rear of the column, some Naginata men outflank the attacking Sohei.
..but the rest smash in to the defensive line. 
 The fighting is bloody! - and brutal! 
 The flanking Naginata men begin to get the edge in their battle..
 ..despite a group of peasants coming to the Sohei's aid.
 In the main line, the fighting breaks up into a series of individual duels.
 
 On the bridge, the Samurai's missile troops turn and shoot... 
 ..a group of Ikko-Ikki Tippo men threatening their flank.
At the column front the Sohei smash in. 
 One group loses one of their number to the flank ambush, but turn and attack their tormentors!
 As night begins to fall, both sides break off, casualties are heavy on both sides.
 At the column front the Samurai beats a grateful retreat before his force is wiped out!
 Some men pay the ultimate cost of covering the withdrawal, and die with honour.

So the battle ended, the Ikko-Ikki force having achieved its objective of breaking up and disrupting the Samurai force.

If the Samurai commander had used his greater mobility and raced over the bridge instead of standing, leaving a small force of Samurai to defend the far end, perhaps with shooting troops in support, forcing the Ikko-Ikki to fight across the bridge though, who knows?

Samurai - Lawrence, Ian, Phil and myself

Ikko-Ikki- run by the rules solo system.

I had a good sleep when I got home after this game - sometime it feels like you actually fought in the battle yourself!!!!

(The rules used are downloadable from Tyneside Wargames Club downloads page