Welcome!

Welcome to the Blog of a Skirmish wargamer! I hope you enjoy reading it!


All my rule sets are freely downloadable from our club website's Downloads page


If you need to contact me my E-Mail address is richardbradley5@gmail.com


Monday 31 January 2011

Taler du Dansk?


'Cause as of today, it's the new official language of northern Mercia!

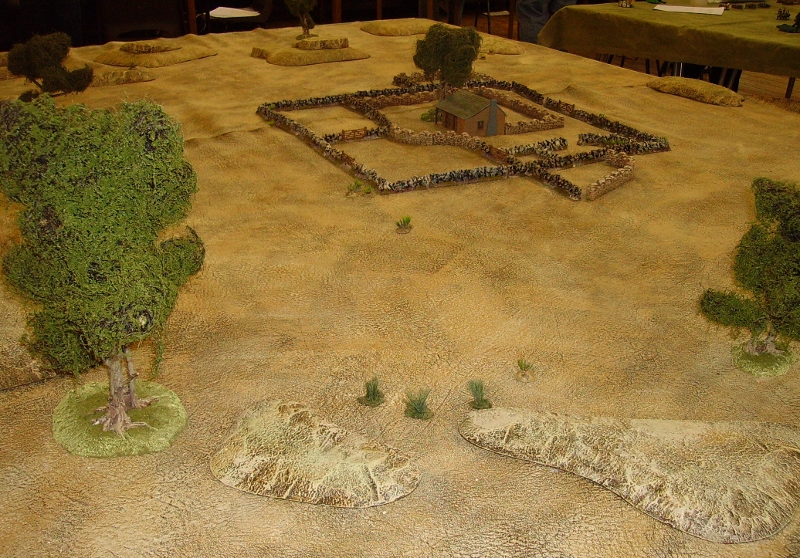
 Ian made one redeployment too many.  From a starting position of unbroken shieldwall, he came forward to anchor both flanks on terrain features.  Made sense, good move and I said so.


Then as I continued to incline around to his left, he pivoted on the Left , bringing the right end of his line around to the next terrain feature.


 If anything, even better, as this was closer and allowed him to form a shorter shield wall AND retain a reserve.

Then, though, he detached two small units from the right of his line to go and form a seperate shield wall, out of supporting range of the rest of his force, on a small hill of no significance.

I thought: thanks very much, don't mind if I do!

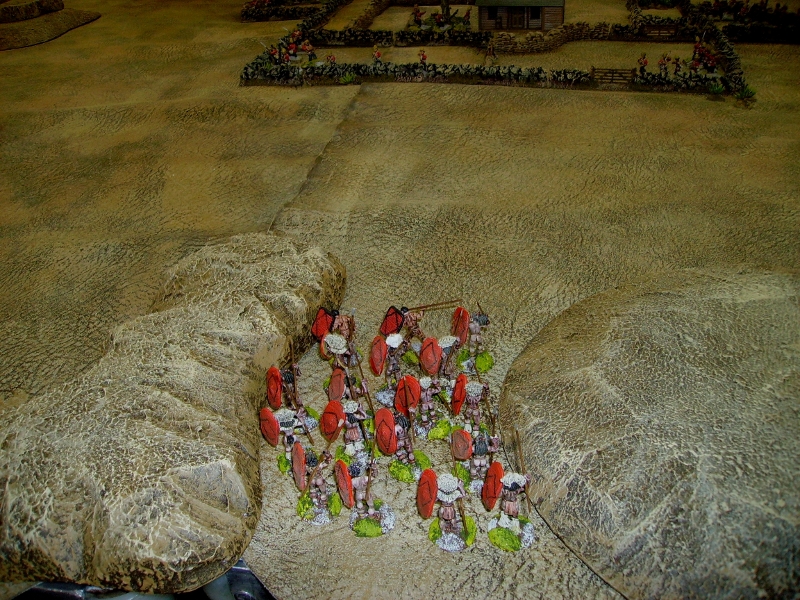
This was the element I was closing in on - with my Jarl's armoured Hirdmen -  through the rough terrain when you left.

To go around the rough terrain I would have either had to present myself to his slingers or march across the front of his main force and invite a flank charge - didn't much fancy either.


As I came to the edge of the rough terrain, the two-unit shieldwall left their hill and charged me!  Basically, giving up a permanent +1 uphill bonus for a one-round-only charge bonus.  And because I was still in rough ground, his ranked spear bonus was negated!


I got the best of the melee - Ian bemoaned the dice.
 Bottom line is, I didn't throw great dice; he threw poorly and I did just enough. 
My men were mailed, so Saxon narrow-margin wins just bounced, and had 2-H axes, so Viking narrow wins went up +2.


The only really jammy throw of the game was a hopeful punt with a javelin by one of Ian's peasants, which one of my D12 Bezerkers caught in his teeth for an instant kill!


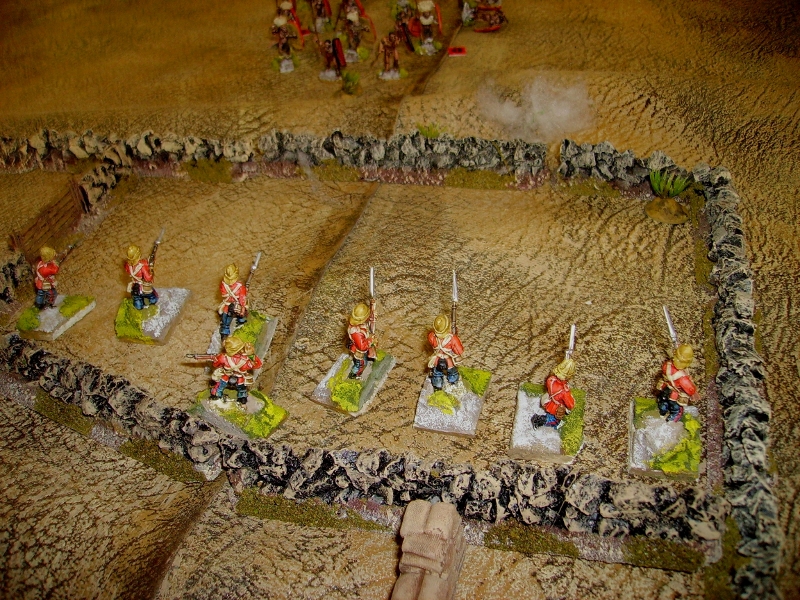
The Saxons did reinforce their isolated units, but, for some reason, not en masse... they only sent one other element to join them.  Moving to flank my engaged unit, they found my biggest unit - spearmen, mixed armour - in rough ground, barring their way.  Again, they charged into the rough ground, neither side getting their ranked-spear bonus.


By half-three, the remnants of the isolated Saxon shieldwall were running away, and their relief force - failing to make any headway through the contested rough ground - was now similarly isolated and next in line for defeat in detail...

My archers had routed the Saxon skirmishers and moved to a position where they could bring the main Saxon shieldwall under fire...

My mighty four-man cavalry horde had reached the rear of the Saxon positions...


And at that point, the Saxon Thegn conceded the game, handed over the keys to the Burh and started updating his CV.


Cracking good fun, I thought, and we didn't manage to break the system at all!

Note:

I was stuck working this Saturday, so only got a chance to pop into the club for half an hour to say Hi and snap a few pics of Ian and Phil's Saxon/Viking skirmish game.


Phil - left- (A.K.A Einar, A.K.A. Norman D Landings) kindly sent me this summary of the game by E-Mail.

Einar - making a guest appearance!

I  inserted the pictures I got where appropriate!

Wish I could have played in this game, I could have brought my trees etc down, it does rather look like a fumble in the bushes in some of my pictures!

Herkybird!

Sunday 23 January 2011

Last stand? - Colonial Skirmish AAR

We decided to do this game as it was the Anniversary of the famous defence of the mission station at Rourkes Drift during the Zulu war in 1879.

Situation:

We decided to make a hastily fortified farmhouse the objective of the screaming native hordes in the style of Rourkes drift, but as we could only muster about 200 natives, we limited the 4 British players to a squad of 7 men and an NCO each.....


 The farmhouse was surrounded by a wall, with 2 kraals and 2 improvised redoubts, one either side.


As the Sun rose, the British took up their positions to await the oncoming storm.


The south redoubt was held by my squad


The left front (North Eastern) wall was held by Lawrence's squad.


The right front wall (south eastern) wall was helf by Ian's squad.
Phil was left to hold the Northern redoubt - now for the natives!..


Facing my southern redoubt was a large band of spearmen...


..While a group of Musket armed natives attacked my flank from the west.


Facing Phil's Northern redoubt, no less than three groups of spearmen gathered.


Facing Lawrence on the North east a group of spears backed up by a group of musketeers appeared. 


To the east stood the menacing Maiden Guard, facing Ian..


The battle:

The Musketeers on My flank made a dash for the apparently undefended western wall


..But were blasted by accurate Martini Henry fire from my redoubt.


,,,And broke for safety back towards cover never having fired a shot!


My men rapidly turned to the south, where the spearmen were advancing at the same time..


They started to take casualties immediately...


..But kept on bravely advancing - British sweat began to flow!


The brave natives assaulted the redoubt, but my men fell back firing to the wall behind...


The natives tried to climb over the mealie bag defence, but the first man over fell in a hail of bullets and they flinched - stuck behind the meallie bags they were simply targets for my men to pick off...

....... and soon they fell back towards cover -- leaving my men to help Ian to my left


Ian was facing the maiden guard, and two other spear bands...


The first group advancing were quickly halted under a galling fire..


The advancing Maiden guards were next to attack..


Scattering a small group of Thompson's Gazelles en route!


Ian's men fell back from the wall to extend their firing time...


..an eventually the maidens first halted then fell back, leaving Ian to face the third warband, haltingly supported by the remnants of the first band who began to advance again!


There was a danger the position could be overrun, but my men were finally able to fire into the advancing spearmens flank!


They nearly made it! - but were stopped by steady fire!--They broke.


So, what was happening in the north, our attention now turns to them....


Lawrence faced a spearman attack, supported by skirmishers, who stayed safely out of effective range!


They were soon falling back to cover, having had more open ground to cross they never threatened to reach the wall the British were defending, which was just as well, as we shall see!


Two Spear units advanced on the northern redoubt, defended by Phil's squad...leaving a third in reserve.


Astonishingly, Phil's men disobeyed orders and tried to bayonet charge the advancing natives!


As the full number of attacking enemy became apparent, they fell back to the safety of the redoubt.
Unfortunately, they had now lost much of the firing time needed to stop a charge and were engaged and overrun by the rampaging hordes!


Falling back, leaving several dead behind them, a second band tried to outflank their left..
   

Lawrences men, having seen off their opponents, as well as the command squad hurredly added their fire to ambush the natives as they penetrated the defences...


..and soon the natives here were being driven back...


The reserve unit now advanced and tried to outflank the British right...


..the British still being forced to stop a second attack inside the walls...


Eventually, a few British were spared to shoot at this outflanking unit...

..though not enough to stop them entering the compound, led by their Chief!


A final action took place in the compound at bayonet point...


..which only ended with the death of the chief and his bodyguard.
This signalled the end of the game.


Leaving the lions to clear the remains!


Overall a damn close run thing!

We have made a couple of minor modifications to the rules as a result of this game, if you want the new version, they are available (free!) at: http://tynesidewargames.co.uk/downloads.html

The system is designed for either opposed or solo play, we always do multi-player forces opposed to the solo system!

Hope you enjoyed this as much as we did playing it!