Welcome!

Welcome to the Blog of a Skirmish wargamer! I hope you enjoy reading it!


All my rule sets are freely downloadable from our club website's Downloads page


If you need to contact me my E-Mail address is richardbradley5@gmail.com


Saturday 25 January 2014

BTLB2, trying variations.

Today, we tried another game of Beneath the Lily Banners and tried elite/raw troops, together with Blade cavalry, to see how the different types act under these rules.

Phil had brought his Turks, and Ian joined him with some Danish troops, Lawrence and I had a purely Austrian force.

Lawrence deployed on the Austrian right, with a Kuirassier brigade to the right of his infantry brigade (1 elite and 2 drilled battalions and 1 raw battalion)
I held the Austrian left  with a Kuirassier brigade to the right of an infantry brigade (3 drilled and 1 raw battalion, supported by a field gun)
Opposite me, Ian placed his infantry (2 elite and 2 drilled battalions supported by a light gun) and 2 squadrons of dragoons. 
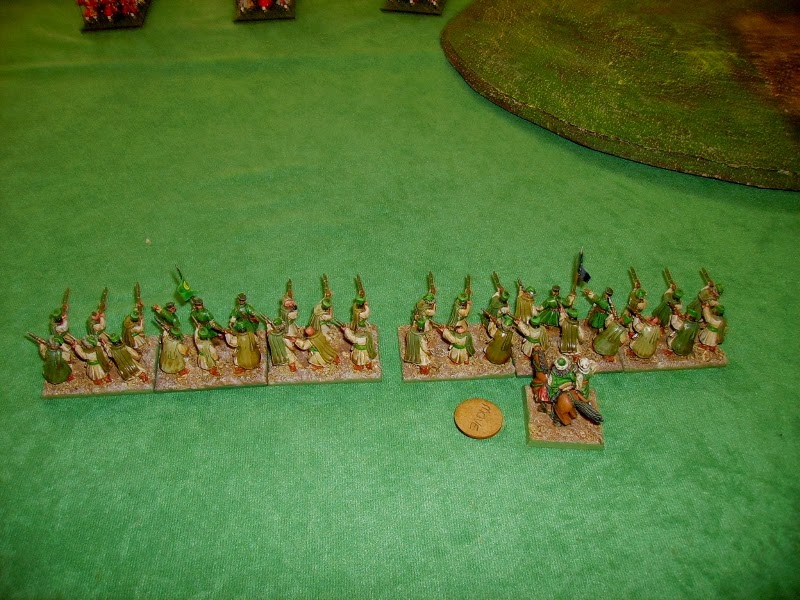
 Phil, opposite Lawrence, deployed 2 Turkish drilled battalions...
On their left, 3 squadrons of elite, blade cavalry (ouch!) 
 ..supported by camel gunners counting as another light gun.
The game started with my force advancing in line. 
Ian, having a poor command roll, only advanced with 3 of his battalions. 
On the other flank, Lawrence formed column to advance more quickly. 
 His Kuirassiers advanced toward the superior Turkic horse.
 The Austrians continued to get excellent command rolls, and the advance continued.
 Lawrences columns began to converge to avoid terrain.
 The Austrian right wing cavalry attempted to charge.
The Turks were only able to countercharge, if they could! 
In the end, only one Austrian squadron charged, and was met by a Turkish unit.
The Turks wiped the floor with the Austrians! 
....then succeeded in not pursuing their routed remnants! The 2 remaining Austrian squadrons now managed to charge, and were countercharged too.
The Turks infantry, unable to move, awaited Lawrence's infantry. 
Ian stayed in position, also hampered by the poor command rolls. 
This allowed my infantry to manoeuvre with impunity. 
My Field gun had a great dice day,
... and soon the Danish Guards were shaken by their losses to it. 
Lawrence's infantry found they could not deploy both forward battalions into line as they had got too close together! 
 This left 1 battalion facing 2 Turkish ones.
Back with Lawrence's horsemen, the first unit also broke on contact. 
 Again, the Turks avoided pursuing them.
The other Kuirassier unit had also charged... 
 ...and soon followed their broken colleagues.
 This time, the Turks pursued, and dispersed the routers. 
My Infantry was forming a 2 line formation. 
The other elite Danish unit, joined by dismounted dragoons, moved to stop my cavalry which was threatening from the large central hill. 
This protected the Turkish infantry who were easily winning the fire fight against Lawrence's hapless battalion! 
 Lawrence was threatened from his flank by the rallied Turkish cavalry...
At this point , it looked like a Danish/Turkish victory, so we called it a day. 
The game had been quite fun, and instructive. I think we all learned more about how the BTLB2 system works!

Lessons learned included:
(1) Infantry need to be in 2 lines to count supported on the flank units of a brigade.
(2) Elite, and Blade classifications make cavalry VERY good against bullet horse and Kuirassiers.
(3) It is critical to keep advancing columns sufficiently apart to allow deployment into line.

These rules are still very enjoyable to play! - I am motivated to keep painting my Franco-Bavarians!

Saturday 18 January 2014

Virginia creepers

Today, we did an American Civil war skirmish. For the past couple of games, we have been using Breech loader armed Berdan's sharpshooters, which clearly showed the amazing power of magazine fed weapons!

Today, we returned to the vast majority types of the Civil War, men armed with percussion cap rifles.
We decided, for another change, to have 2 identical forces, and make this a game of tactics and luck!

We diced to decide who commanded what, and dice being how they are, Lawrence got Phil as a sub commander, in charge of the Federals, and I got Ian as my second, with the Confederates!


The road junction (the game objective) from the Union approach road.
The Union company arrived first. Phil's men in the lead. 
My half company arrived down 1 fork in the road...
... Ian came down the other. 
 Both sides continued down their roads until Phil's men spotted mine.
 They jumped a fence and tried to outflank me!
 Lawrence's men followed but turned left into a farm. 
I began to marshal my men into a farm by the junction.  
 Ian arrived on my right and decided to defend the junction.
 I fired at the Federals crossing the open, then a second section replaced them while the first section reloaded.
 3 Feds were killed from the first group, only 1 and 3 wounded from the second I hit.
The rest of Phil's men made it to the woods on my left.
Ian began skirmishing down the road.. 
 Several Feds fell.
 The survivors hid in the farm after replying. 
 Only one of Ian's men was killed.
 Some of Lawrence's men left the farm and began to outflank Ian.
 I moved some of my men round the farm I held to protect the threatened flank.
 Ian began shooting at Lawrence's men. 
Despite the range, he hit a few. 
Phil's battered men continued trying to outflank my farm. Their wounded struggling to keep up!
Unseen, they began to form up for an attack on me. 
 Lawrence was engaged with greater numbers of Ian's men.
 A couple of Rebs fell.
They returned fire. 
 The Feds were hit again.
 The fire fight continued.
 The outnumbered Feds held on.
 Lawrence's outflanking force continued moving.
 Ian's men kept losing men, but at a lower rate than their enemies.
Eventually, Phil got into position to swamp my flank unit! 
Only one section attacked, and lost 3 to my one. 
 My men attacked and routed the disrupted Federal section. 
Some of my  other men moved in support of the attacking unit.

Back on Lawrence's flank, his men were losing heavily. 
 Ian's men were still very numerous! 
Ian brought a unit that had been supporting me to play on Lawrence too. 
 Lawrence's figure managed to hold the Feds in place.
A final volley from Ian... 
...made the remaining Feds in the farm flee.

Phil, meanwhile, counter attacked my unit in the wood.
My men pushed their tormentors back but were volleyed by another Union squad. 
As the survivors withdrew, one of my reserve units joined the battle. 
 Ian's men now turned to fight Lawrences outflanking force..
Seeing they were outnumbered, and taking heavier losses than Ian's men..
 The Federals decided to fall back and cede the battle to the Army of North Virginia!

This was a hard, but fun game. 

I think the Union lost because they separated their forces, meaning they mostly ended fighting greater numbers of enemy.

Good dicing always helps though! - and the brave boys of the South had more than their fair share of these!