Welcome!

Welcome to the Blog of a Skirmish wargamer! I hope you enjoy reading it!


All my rule sets are freely downloadable from our club website's Downloads page


If you need to contact me my E-Mail address is richardbradley5@gmail.com


Saturday 20 November 2010

How to use the Wings of War Solo rules!

I have been asked to show how my solo system works for WofW!

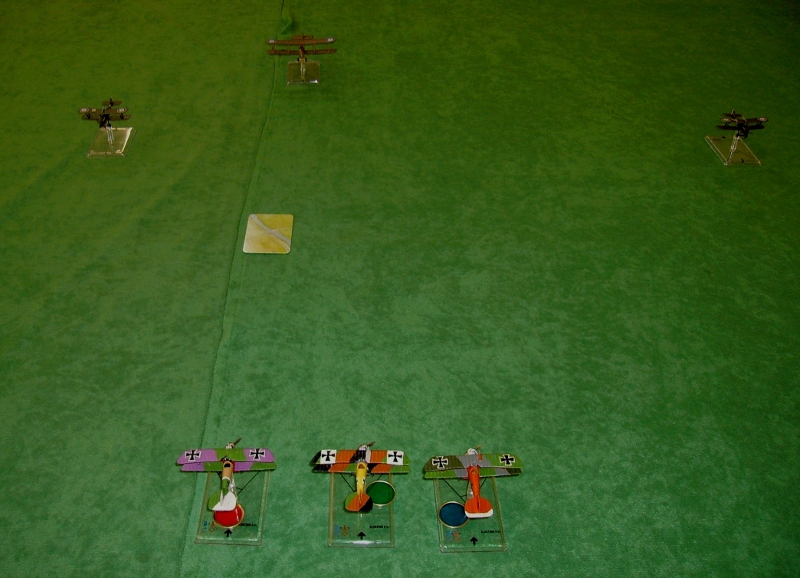
Until the enemy comes within 24" of your sides aircraft, they just move a series of fast straight manoeuvres. I can command my aircraft as I wish...


Each turn thereafter, I place my manoeuvre cards as normal.

Then I throw a D6 (or flip a coin!) for each solo run aircraft....


Typical! - a 1! - though in this case its not bad!

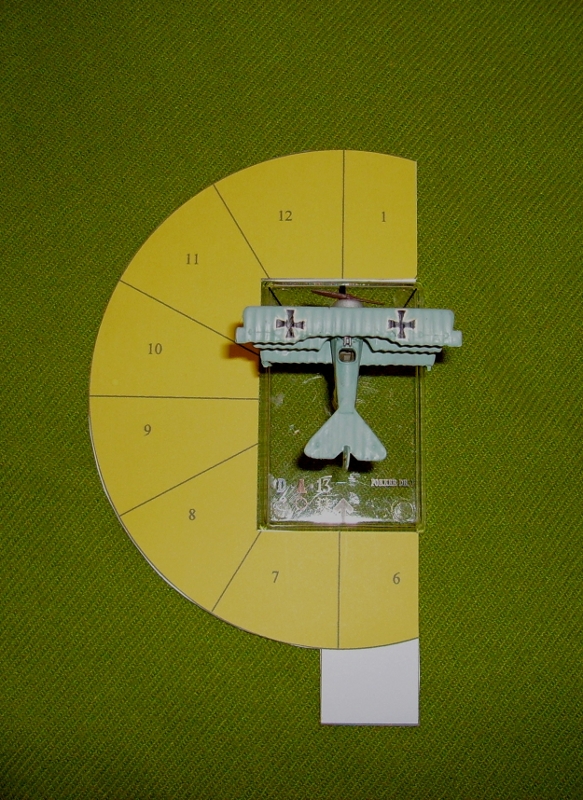
and place the game template around the models base...


...then see in which numbered sector the nearest hostile model is in, then cross reference the sector with the die roll on the Manoeuvre card....


..and place the relevant 3 Manoeuvre cards as normal on the play card.


..and play the three moves as in an opposed game as normal!

And if you are lucky....

Dakka-dakka-dakka!

Yay!

Back for char, what?


(Incidentally, I normally repaint all my models- the SE5a is Rhys-Davies' and the Fokker DR1 is Werner Voss')

Saturday 13 November 2010

Einar strikes back!

Situation:

This was a follow up game to our last Viking bash http://blog.tynesidewargames.co.uk/2010/06/viking-game-29th-june-2010.html

The Battle:

Once again Gunnar the aggreived sought vengeance through combat with Einar Scumbagga. Once again Einar took up a position behind a waterway, but unlike the river in the last battle this was a mere stream.


Both forces split into two wings and advanced...


Einars forces, with nothing to gain from an attack, remained behind the stream and positioned themselves on 2 small hills to await Gunnars attack.

Gunnars 2 forces moved to attack across two fords...


Gunnar himself remained in the centre between the two wings, supperted by six archers.


The archers attached to both sides began a long range arrow fight, and despite the wind being against them, the greater number of Gunnars archers began to tell. In time all Einars archers on the hill were dead,but not before their courageous stand  caused two fatalities and several injuries on their advancing enemies.


Another small party of Einars archers belatedly advanced to shoot from behind cover on the stream edge, but had little effect before they were charged and scattered by Gunnars men charging across the ford.


On the left - Gunnars spearmen had followed a track to the second ford, some of Einars men moving to guard the ford rapidly falling back to their hill rather than face this overwhelming force. They began to form a line facing their threatened flank.


The spearmen crossed the stream ford and spread out to attack the hill facing them in concert with some swordsmen on their right.


At this point Einars troops began to counterattack - on the left a group of spearmen on the second hill moved down to attach Gunnars right wing crossing the ford, though they had to suffer shooting from Gunnars Javelinmen and archers


In the centre, Einars mercenary saxon spearmen attacked the Viking swordsmen who had attacked their archers, this fight mushroomed as more troops joined in.


The spearmen Gunnar had sent round via the second ford now attacked Einars men on the hill, killing one on contact, but Einars men rapidly reformed their line and began to resist.


 Sadly, the sun began to set before any more progress could be made. Einar, leading from the rear, managed to slip away again. Though he had lost a few more men than Gunnars force, he was holding his own and managed to withdraw safely into the autumn gloom...


 (Einar - Phil, Gunnar - Richard and Ian)
(Rules - our own)

Monday 1 November 2010

SE5a action

This was another Wings of War game at Tyneside Wargames Club.

Ever since the SE5as were released as miniatures I have been very keen to see how they 'fly'.

We have been playing a sort of Campaign which is a game generator - occasionally- so this was a good chance to advance our characters some.

In the first game we forgot to take pictures, but suffice to say after bagging an Albatross I got seriously wounded and fainted in my cockpit, and got killed in the resulting crash landing. We lost that one.

In the second game, we got a reconnaisance mission, which reminded me to get my camera out!

Situation:

We were flying 2 SE5s in escort to a DH4 attempting to take pictures of a Boche artillery battery.


We were faced by 3 Albatross DVas approaching from the far side of the table.


As we approached the target, the 2 SEs moved away from the (increasingly nervous) DH4, but the Boche stayed in a line formation playing their own version of 'Chicken'

Just short of collision the Albatrosses turned to engage the SEs and almost immediately one of the SEs sent an Albatross in flames, which put the advantage in numbers with the allies.


 The DH4, meanwhile, swung round the resultant dogfights and bravely held a straight course to take the vital pictures.


 The SE5s - after fencing with the 2 remaining Albatrosses...


 safely disengaged and followed the DH4 off table, their superior speed aiding their escape.


The Albatrosses were left behind -just looking pretty!


(Players: Lawrence (DH4) - Ian and Richard (SE5as)
(Albatrosses run by Solo System)