Happy New Year to all our readers!
I have been working on some Trireme rules for a few weeks now, and have been making gradually improving models to play with.
Today was the first proper playtest of the rules, and I have got a few notes in my first print to update as a result!
The new rules 'Trierarch' (The commander of a Greek Trireme) and the movement templates.

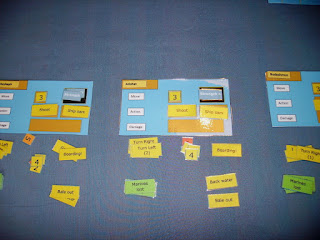
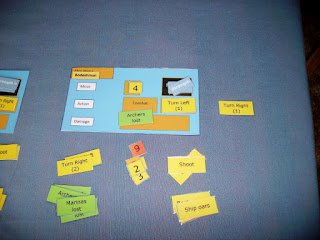
A card ship and the dashboard and counters used in the game.

The rules have a solo rules section, who would run 4 of my old card ships I made several years ago and never did anything with!
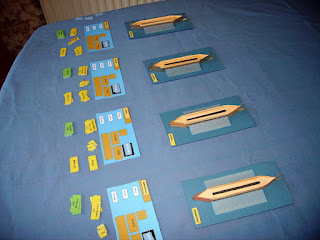
These are 4 of my new Triremes...they look rather better, at least to me!

This shows how I use the movement template...

...it shows how it stops deviation in a straight move.

My orders were an increase in speed in a straight line forward.

As I could increase speed by 2 each turn, I was able to reach 3 in the second turn, 4 would risk me losing strength in my crew, and 5 would definitely tire my crew, taking one of my 3 Strength counters.

The Phoenicians had faster ships, so could travel at 4 easily, only rising or losing Strength at 1 speed more than the Greeks.

Both sides advanced towards each other.

The solo system only kicks in at 10" range...

The next move we were well within that!

To avoid getting their oars sheared, the Phoenicians withdrew oars, and their archers prepared to shoot.

I use Junior General (LINK) flats for my crews! The Phoenicians have larger crews, one more stand of marines or archers.
My Greeks had 2 stands of Hoplites and one of Archers/slingers.

Having Shipped Oars meant the ships would go one speed less each turn...
...which affects the slower Greeks more.

They almost got into contact, but well within bow range.

Amazingly, two Greek ships shot the Persian archers on the enemy ships without taking any loss themselves.

The other two fights were uneventful.

I logged the lost enemy archers.

When ships meet nose to nose, rather than have models on top of others, I decided to have them swap places.

I used the move templates to mark the original positions so I could move them accurately.

So...

I tried a different way next ship, this is easier!

I quickly performed the 'Diekplous' manoeuver quickly after that!

The archer were still in range - my flagship lost its bowmen, but one of the two archer stands on the Phoenician ship died too!

The Phoenicians were the big losers in shooting!


I now gave orders to turn on to the vulnerable rears of the Phoenician ships.

The Phoenicians had the same idea!

I will have to play width ways next game as this ship got an order which would have had him off table!

I therefore replaced the right turn with a left one.
This was the way I planned to do a turn, using the movement templates...

I had to be careful not to ram my own ships!

My Flagship had to back water to avoid a collision!

I got 3 ships into a synchronized turn, the Phoenicians, like me had one ship having to speed out of the way to avoid getting hit!

I figured out how to turn quicker, just by using the little template!

Just push it under the base of the ship...

...using my fingers to square it neatly.

...and pop the ship on the far edge...easy peasy!

My flagship turned in to slow ram a Phoenician who was slightly ahead of me.

It was getting confused out there as ships tried to get into ramming positions.

The Phoenician ship was undamaged, but the crew swarmed aboard my flagship.

The 'Thera' sailed alongside me and rammed the Phoenician ship.

In the first round of melee, one of my hoplite stands was killed as well as a Phoenician one.

Another Greek collided with another Phoenician, as the first ship rammed slid beneath the waves!

Bothe sides tried to board, but my men won!

My Hoplites swarmed onto the enemy vessel. Behind them another Phoenician rammed the 'Thera'.

Before she sank, I managed to get her Marines aboard the Phoenician vessel. The Hoplites made short work of the lighter Asiatics. The Thera's Hoplites also captured their Phoenician ship!

As my Flagship's Hoplites were driving the Phoenician marines into the sea, the final Phoenician ship failed his morale and headed back to face the wrath of the Persian king!

So, a learning game, but I quite enjoyed it. I certainly learned to give ships plenty of maneuvering room as they get in each others way!!!
Next, I will have to get my friends to try the rules, I hope they like them!
Looking good, and I love the models :)
ReplyDeleteCheers David! I am happy with the cost of pretty much nothing too!!!
Delete