Today's game was a return to the American Revolution, only Lawrence and I were here this week, and I had re-jigged the army compositions slightly from previous games!
As in most games, the initiative was with the British, and big time! - they got to deploy in both flank sectors, while my poor Americans had to deploy in the centre, though at least I got to choose side of table!
I deployed on the left in this picture.

Lawrence's left was the Hessians, with 2 units of Feldjägers on his extreme left.

His centre was rather thin, four regiments of foot screened by a Light Infantry battalion.
His right had his Scots and Grenadiers at the base of a hill, flanked with four more foot regiments, more Light Infantry and the 17th Light Dragoons.
My left was weak, but I thought the wood would give me a line to defend if things went badly here. I had light infantry and riflemen, a lot of artillery, and some Continentals.
In my centre I had my Virginians and Marylanders.
My right was the New Jersey regiments, supported by all my Militia.
The British started by sending the 17th Light Dragoons forward, probably to try and take out my light infantry and artillery?
The right centre failed to move, apart from the Light Infantry who went forward alone.
The rest of the British army failed to move as well, apart from their Light Infantry!
The Hessians moved though! they tramped into the farmyard while the Feldjäger Korps skirmished forward.
My right got moving,mostly, though slowed by their poor drill.
My centre advanced enthusiastically. I felt if I was to succeed my strongest troops would need to win it for me.
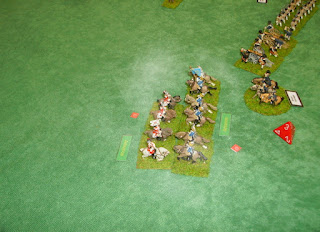
On the left, my 2nd Continental Light Dragoons bravely went to face the British, and protect my guns.
The two regiments trotted into combat!
The British had been disordered by my guns on their way in, and this saved my men, but neither side won this turn!
Lawrence had got his Grenadiers on the hill, and my Marylanders engaged them.
The British fired back, but my men held.
My Continental cavalry finally got the upper hand in the melee.
The British Lights fell back in fairly good order, but beaten!
On my right, my New Jersey Continentals took the hill, driving the Feldjägers off it, though their fire upset my troops.
In my centre, the British musketry was not up to its usual standard!
The Scots and Grenadiers were hammering at my Maryland regiments.
The British centre had finally advanced and came under my artillery fire.
On the 'Grenadier' hill, my men were damaging the British, trading volley for volley.
In the centre, my Marylanders were starting to gain the upper hand.
On the right, my New Jersey troops, supported by the Militia continued to drive the Feldjägers back onto their following infantry.
My brave Marylanders finally lost to the Grenadiers, and retreated, but in fair order.
My Light Dragoons charged the Light Infantry who had been threatening my Riflemen, I had expected to rout them, but they retreated in good order...
The fresh British regiments destroyed my Dragoons!
My Virginians were pushing forward, and shot down a gun crew.
They were taking minimal losses.
My Riflemen were shooting down the Hessian Grenadiers who were slowly working through the farm.
The Hessians were trying to form a coherent defence against the hordes of Americans approaching!
The Hessians still held the farm.
To their right though, the British brigade retreated in confusion from my Virginia/Marylanders.
The British right was stuck on the hill.
At this point, Lawrence decided to pull out, the collapse of his centre was the tipping point.
To my complete surprise, my Continentals had their first victory!
PS: Newly updated versions of my Seven Years War and American Revolution rules are free to download from this LINK


No comments:
Post a Comment