Today I was off with my extended family doing...stuff!
This meant I was not at the club! - But Phil was, so he has done a report of the game I missed!
So without more ado, over to Phil...
In a dusty Hollywood studio backlot circa 1954, a host of extras swapped their stetsons and war-bonnets for pith helmets and turbans to shoot a wide-screen colonial epic with little regard for historical accuracy!
The stage is set for the climactic battle scene - a fortified compound in the Sudan, wherein the beleaguered British garrison would have to hold out until the arrival of a relief column.

My besieging Mahdists open the ball with a volley from their mountain gun!
I have the notion that reducing the northern buildings will offer the faithful a way into the compound without forcing the strongly-defended gate.
Lawrence has authored some splendid unit cards, along with leader-characteristic cards.
My artillery chieftain is... not to put too fine a point on it... an idiot. If I roll a '1' at the start of the gun's action, the opposing player dictates what the gun does!

Solid hits start knocking structure points off the north-west corner building.
Roderick, commanding the British garrison, realigns his crew-served Nordenfeldt gun to command the courtyard.

Baluchi mercenaries take possession of the outlying mudbrick house and from its roof, start to pepper the British section holding the gate.
In return, fire from the squaddies on the north-east rooftop puts a pin marker on the second Baluchi force.

On the western side of the field, two units of Irregular askaris use their 'fieldcraft' trait to hunker down in the rocky bed of a dry donga.

The tommies are on the back foot - failing to remove their 'pinned' marker, a compulsory withdrawal begins.

But the Baluchis pile on the pressure and the section breaks! First VPs to the Faithful!
The disgraced british ensign must seek solace with a bottle of whisky and the Mess Webley...

Curses! At the very first time of asking, the British relief force, commanded by Lawrence, arrives from the south. Two units of lacklustre constabulary in the foreground, burly Sikh regulars and a mountain gun in the centre, and two units of Askaris in the background.

Back at the north-west wall, panicked squaddies tumble down the stairs as cracks spread across the shell-battered bastion. (Aaagh, no!, the fickle finger of fate!)

And the building collapses into a pile of rubble - difficult terrain, but a breach nonetheless.

Her Majesty's forces face yet more calamity as speculative long-range fire downs two of the machine-gun crew.

At last, the Mahdist reinforcements turn up! Zanzibari foot and arab lancers press onto the field... but poor activation rolls leave most of them dawdling at the sidelines while the plucky brit relief forces push on in fine style!

Case in point! The lancers make a fine show of things galloping through the canyons, but the camera pulls back to reveal they're still miles away from the infidels.

This is more like it! Unsuspecting constabulary shamble towards my lurking askaris!
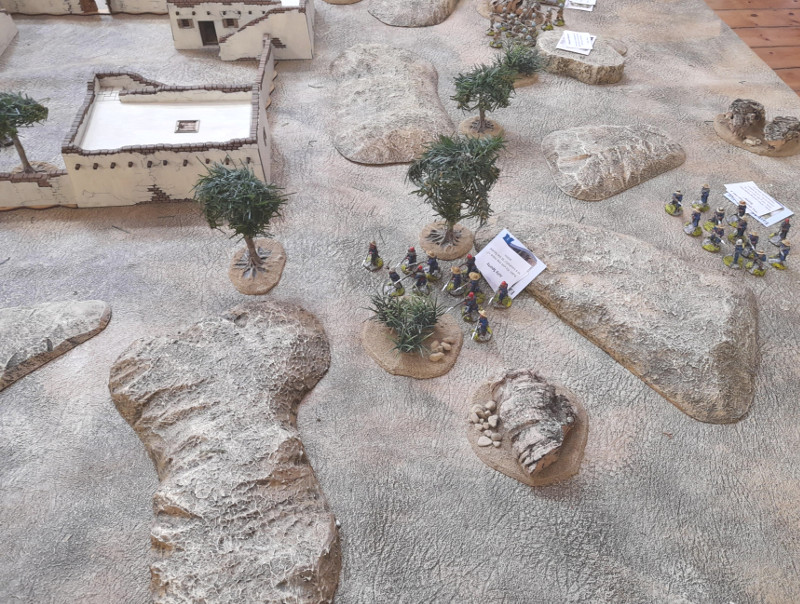
But Lawrence isn't about to stick his head in the lion's mouth! The imperialist running-dogs form up on a crest line. Both sides burdened with obsolete rifles, neither can do any harm at this range. Insults are exchanged.

Meanwhile, in the compound, the nettle is grasped! But slowed down by the rubble, the lancers are shot to pieces by concentrated rifle and machine-gun fire and none come to grips with the foe.

On the west of the field, a spectacular round of Mahdist firing routs one unit of constabulary. In the background, however, the stalwart Sikhs close ranks for volley fire!

Disaster strikes for the Baluchis!
Lingering a round too long on the hill, they have missed their window to rush the compound gate and now the British askaris are upon them.
One unit is badly mauled and the pitifully few survivors forced to retreat.
The unit on the rooftop gets a compulsory retreat result, but that only takes them into the building, where they successfully rally and begin to fort up!

One section of zanzibari mahdists goes into cover by the waterhole and attempts to take some of the pressure off the Baluchis.

This does nothing to help the lone survivor of the second Baluchi unit, who is miraculously still hanging in there. The hapless extra gets a close-up moment as no less than 6 Snider-Enfield rounds strike home.

But it's the formidable Sikhs who strike the decisive blow. Volley firing down the western side of the building, they annihilate a second unit of lancers massing for a dash across the rubble into the compound.
Foiled, the Mahdists sullenly withdraw.
They have plenty of viable forces left in play, but the scenario objective - the capture of the compound and the head of the despised political officer 'Hong Kong' Higgins - seem beyond their grasp for today.
Higgins himself was represented on the table, but spent the game cowering in the safety of buildings!
The game provided a brisk back-and-forth, with victory hanging in the balance right up to the last!

Sooo, I missed an exciting game! - never mind! - Many thanks to Phil for his nice pictures and entertaining text!


