Following a request from a young man in Poland, for a tutorial on how to use my Sword and Dagger rules, I did a small game and detailed just about everything that happened--I ended up taking 150 pictures!
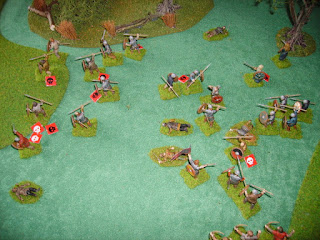
I chose a Viking v Viking game. There is just something iconic about seeing a host of Dark age warriors standing still upon the ground, waiting for battle!


I chose a Viking v Viking game. There is just something iconic about seeing a host of Dark age warriors standing still upon the ground, waiting for battle!
The first thing you need is a table with suitable terrain!

You also need the rules and quick reference sheets

...and, of course, some figures!

You will also need about 2 of each of these dice (D4,D6,D8,D10,D12)

Use the lists at the back of the rulebook to calculate a force. This dictates the numbers allowed, and the quality, weapons and armour each figure can use.

The cost of these elements dictates the cost of the figure. For example a Sergeant (The basic professional soldier in these rules) with a mail coat, spear and large shield would cost 3 (Sergeant) + 3 (Light armour) +1 (Large shield) for a grand total of 7pts (His spear is free!)

The armies are 'Viking Homeland' forces. I used Ragnarr as a Berserkir 'Lord', with Lagatha and 3 Shield maidens as 'Knights'. I was supported by 10 'Sergeants' with spear and large shield, half in Mail. I used 3 archers too, Sergeant class, 2 unarmoured, 1 in padded armour.

The enemy were a Lord with hand axe and large shield, and like half his 12 spearmen, in mail. A group of unarmoured sergeants with axe/sword and large shield made up their force, equally pointed with mine at 74pts.

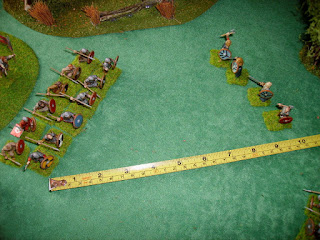
I set both forces on opposing hills.

S+D uses the classic 'I go-You go' approach with simultaneous combat. The enemy moved first approaching me at the speed of the slowest (the mailed spearmen) - 6". The light swordsmen went through the edge of the wood, so halved their 8" move.

Shooting is split between each of the 2 phases of a turn, as it is the enemy phase, only half (rounded down) of my 3 bowmen get to shoot (IE:1!) - the range being medium (over 8" and up to 24").

Its good having archers!

I checked on the playsheet (Yes I have duplicated the range chart! Its been corrected now on our website!)

Being Sergeants, my man shoots rolling a D8.

The target, the big spear block, rolls a D10 for the range, and a D6 as they have shields.

We throw an opposed roll, from this we can see my shooting roll is a 5 (the grey die), which beats the enemy range dice (a 3 on the red dice) but the shot is beaten by the D6 for the shield, so it was an accurate shot but the target man stopped it with his shield!

My phase now, in order to keep shooting with bowmen, I can only advance 4" (half speed for unarmoured or padded armour)

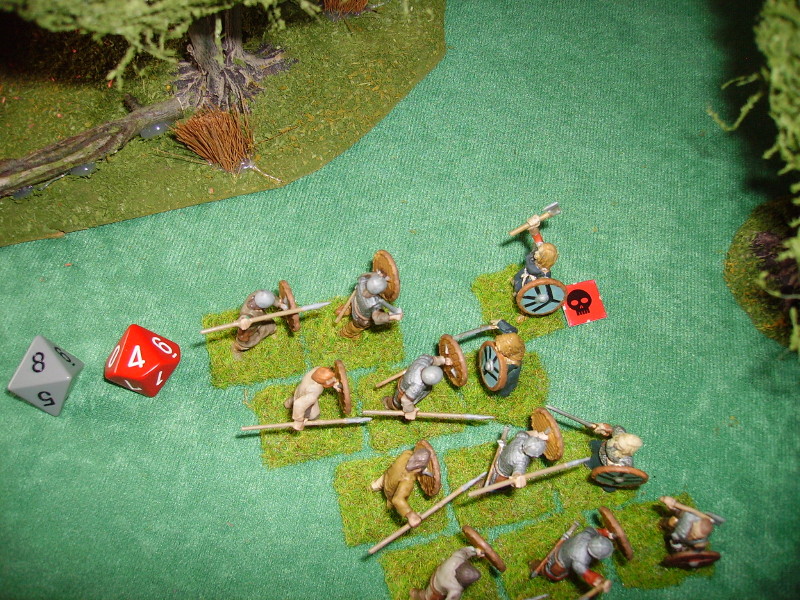
The spears are catching up! Ragnarr leads his girls out to the flank.

Shooting next, as it is my phase, I get to shoot 2 of my 3 bowmen (half rounded up)- its still medium range, so the same dice as before.

Yay, my shooting D8 beats both the enemy dice, the highest being a 4 for the shield...

I dice for which figure in the enemy unit gets hit. 1-6 the armoured front rank, 7-12 the unarmoured rear rank. I hit the front rank.

On the third column (LA for light armour) a win by 1...

...bounces off his mail coat!

My second archer shoots, getting a win by 1 again against the range die this time.

This time, however, I get a rear rank man...

On the first column this shows a LW result, a light wound!

I place a counter on the figure, light wounds don't handicap a figure - but another would make a wound, which would! (2 wounds mean the figure is disabled.)
The unit does not test morale here, only if a figure is Wounded/Killed.

The enemy phase...the swordsmen leave the trees and go at 8"!

The spears continue on at 6"

Battle looms!

My one archer (the enemy phase) - only matches the enemy range dice, a clean miss!

My figures are positioned to give the enemy line a choice of targets,go for Ragnarr and have the spears on their flank, or vice versa!

Annoyingly, My archers are just over 8", short range.

Shooting now at the swordsmen, I win by 1 again...

...Another light wound!

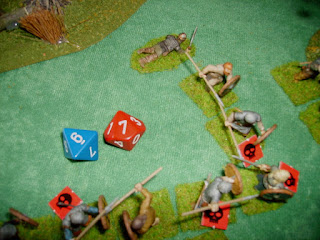
The second shot is...better! A win by 5!

The picture says it all!

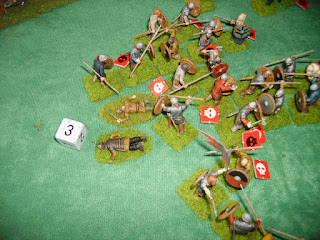
This calls for a Morale check on the Swordsmen...

Having not caused 25% casualties yet, only a '1' would have stopped them.

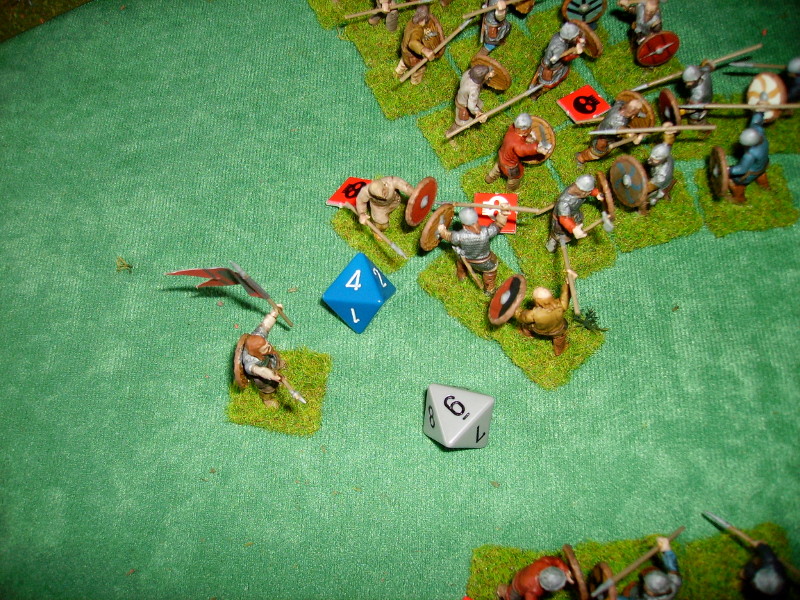
The enemy phase, the Spearmen declare a charge on the shield maidens!

Basically, anything but a 1 to charge, they have no worries!


Ragnarr throws a '1'! But they have the advantage of a Lord with them, so are fine!

We now measure the charge. Even running at 8" some of the spear line will not reach, so cannot outflank my line on the left. Charging figures must match figure to figure before lapping round.

Even with their dead comrade, the swordsmen successfully charge my bowmen.

They dice to receive the charge and succeed.

My bowmen evade up the hill, the enemy spearmen charge in.

Being Sergeants, the enemy spearmen throw a D8, my 'Knights' - the shield maidens, throw a D10, and Ragnarr a D12 (quality dice)

The advantages are a rear rank support (+1) and Charging (+1) - my folk throw higher denomination dice.

Things do not start well for my maidens. They throw 8 (+2), against the maiden's 4 - a win by 6, and a wound + push back.
The victorious spearmen have the choice to follow up, and do!

The next in line only win by 3, which light armoured figures ignore!

Next, Lagatha! She wins by 2! - they are armoured too though.

Ragnarr throws a 2 on a D12, but the enemy roll no better, a win by 2 is not enough against LA (Light armour)

My phase: I don't need to dice morale to charge my spearmen, as they are uphill! - they cannot fail!

My range is just over 3" - enough to count charging against the enemy spears!

My archers, having evaded, cannot move, but can still shoot.

I am still able to shoot as I am at short range and can pick a single figure to shoot at.
Beaten by the shield! - had I rolled lower than the range die, the shot could hit another figure within 2", which includes some of my charging spearmen!!!

Back to the battle line, my wounded shield maiden is -1 for facing an extra figure from the spears rear rank, and -1 for being wounded, but wins the roll, resulting in a draw.

The second maiden loses by 4...

...and is pushed back.

Lagatha wins again, but not by much.

Ragnarr, however, wins by 5 against the spearmen, but being a Berserk, counts as armed with a polearm if he wins, giving him a +2!

The armoured spearman is wounded!

The spearmen I charged in win, but not by enough.

My spearmen I had as an overlap and pushed onto the rear rank figure wound and push back the unarmoured man.
Some of the spears I charged in were able to attack the swordsmen, being within 2" of the rest of the group. With the second rank spear and charging bonus my winning roll...

...wounds my opponent, who is unarmoured.

I got the same result with the second combat...

...another wound!

They need to test for losses, and losing a melee!

They are -2 for 50% wounded or killed, and -2 for losing the melee, and a futher one for being charged by heavier armed opponents!

No surprise! They Rout!

Overall, my side won, making a morale check unnecessary, but a 5 would save almost anything!

the opposition throws a 2

The enemy Lord is within 2" so counts as with the spearmen, so they stand!

A 4 for the routing swordsmen is not enough, they are gone!

Back to the battle line, my wounded maiden wins!

She only manages to push back her opponent though.

The second maiden has a great win!

The second line spearman saves the spearman, but he is wounded.

Lagatha loses as badly, and is wounded!

Ragnarr wins big again and kills his opponent!- he follows up into the unarmoured spearman behind.

The spearmen are getting nowhere fast!

Even against a lone spearman, my men make no headway.

Another indecisive fight!

The enemy Lord had attacked my rear rank spearman, but only pushed him back. However, as my man was unable to move back due to other figures, he suffers a light wound instead.

The enemy lost again, just, but roll a 6 for morale, 'Bring it on!'.

My phase again, my men on the flank who routed the swordsmen, have the charge distance to hit the rear of the enemy spear line.

...and the enemy Lord!

The enemy figures contacted have to face their attackers (normally, the figure whose phase it is gets to choose the figure he is fighting in multiple figure combats). In the first combat on the battle line, my maiden takes a second wound, and is disabled!

The second maiden holds her own again.

My rear attack fails to make headway.

Ragnarr also finds the opposition difficult to defeat!

...as do the spearmen...

...The second spears facing a single man manage to wound him!

Having forced the enemy Lord to fight my charging spears, he bravely fights them to a standstill!

End of the round, another passed Morale check.

The enemy phase, the free spearmen flow round the maiden, forcing her to...

...face an unwounded opponent in this phase.

A brilliant die roll sees her drive off her attacker as she fights her way free!

Wounded Lagatha has a similar good turn...

...and wounds her opponent!

Ragnarr gets the win, which with his berserk bonus...

...wounds and pushes back his opponent - who also gets a light wound for not being able to be pushed back a full base depth.

The first spearmen are still unable to make progress, but then, neither are their opponents!

The second spearman hangs on despite his wounds, just.

The rear-ranker bravely fights off my rear attack!

The Enemy Lord is fighting gamely!

Another passed morale check!!!

My phase again, my archers have no targets, so move to join the melee.

That brave maiden does well against her lone opponent...

...wounding him.

Lagatha continues fighting her opponent.

Ragnarr is facing a fanatical opponent!

The spearmen are still trying to make headway.

At the rear, its stalemate...until my spearman rolls well...

...a second wound on the light enemy spearman!

Down he goes!

A 3 is just enough with the Lord, to keep the enemy fighting.

Their phase again! the enemy try to gang up on Lagatha and the maiden.

The maiden holds them off again, brave girl!

Lagatha roll enough to hang on too.

Ragnarr finally wounds and pushes his opponent back.

The rear attack wounds the enemy spearman.

The first spears...what can I say?

I threw the wrong dice colours here! I killed my opponent.

The enemy Lord chooses to fight my light spearman...

...but is pushed back, importantly, he is now out of 2" of his spearmen!

This coincides with the enemy spearmen's worst morale roll!

They flee!

...leaving their Lord to face the wrath of Ragnarr!

There will be no rallying for the battered spearmen.

Ragnarr eyes up the enemy Lord.

My spearmen follow up the routing enemy to prevent any rally.

Ragnarr charges the enemy Lord, supported by his archers and spearmen...

Both roll well...

...But Ragnarr fells his opponent with his axe!

So, I hope this shows how the system works! - any queries, just e-mail me at richardbradley5@gmail.com, and I will try to help.
Realy helpful thanks!
ReplyDeleteGood stuff! I hope you enjoy your games! - I have had our website creator put a link to this post on the rules web page, so anyone else who has questions on the rules can go straight there. A worthwhile project!
Delete