Hi there!
Following several TMP posts and the occasional E-Mail querying things about my solo system -- I will try to explain how my 'Risk Factor' system works. The WW2 skirmish system is the simplest, so here goes...
The Germans are randomly positioned as 8 hidden markers, including several dummy markers.
(We tend to make a mix of counters then draw 2/3 of them for the game, so we are never sure how many are 'real' - it makes for a more fun game!)
A British squad is escorting a Sherman to clear a way through some difficult terrain...


The next turn the crew abandoned the tank, and my infantry decided to leave with them, I didn't fancy my chances without the tank!
I hope this adequately describes the system in action. Please feel free to contact me if you have any questions!
The rules are available to download at: http://tynesidewargames.co.uk/downloads.html just look for the WW2 Skirmish Rules.
I will do another post showing how to do the solo system variant used in my other rules shortly!
Following several TMP posts and the occasional E-Mail querying things about my solo system -- I will try to explain how my 'Risk Factor' system works. The WW2 skirmish system is the simplest, so here goes...
The Germans are randomly positioned as 8 hidden markers, including several dummy markers.
(We tend to make a mix of counters then draw 2/3 of them for the game, so we are never sure how many are 'real' - it makes for a more fun game!)
A British squad is escorting a Sherman to clear a way through some difficult terrain...

A Bren team moves behind the advancing tank, a rifle team and a command section are moving through the field.

To see what the Tank does, we cross reference the Risk factor (In this case +2, as there are infantry with the tank +1, and it is advancing +1) with a D6 result, then we consult the AFV movement chart (below)

The tank gets a 1 on the dice, meaning it will stay still, unless advancing with infantry.
The infantry, under my control, advance with the tank.

The bren team move 1 action forward, and spot 2 counters succesfully (a 3 man team can attempt to spot up to 3 different counters)

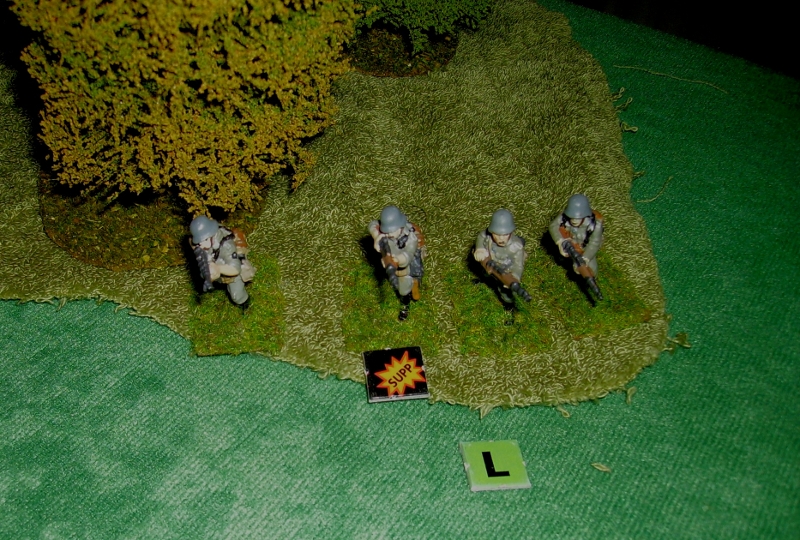
Consulting the schedule, we find a group of 3 riflemen and an NCO with an MP40...

The 2 man Bren team fire 1 aimed shot (They have 1 action left each, as they both moved)and combine their actions into 1 aimed shot- they could have fired 2 unaimed shots instead.
The 3rd man fires an unaimed rifle shot with his 1 action.

The rifle misses, the Bren gets a hit, but scores a 2 on the effect chart, +1 for an MG, gives 3, and puts a suppression on the German fire team.
We now come to the German turn, they obviously spot the British!
Their risk factor is 1 from being under fire.

They then consult the action chart (below)

The Germans score a 4, so at Risk factor 1-2 will 'Continue current action (IE Halted) fire at the nearest enemy'

They all spend 1 action getting rid of their suppression, then all fire unaimed shots at the Bren team. Surprisingly, the only hit comes from the MP40!

..and a 3, +1 for an MG, makes 4, and a rifleman is wounded.

The Bren team checks morale and passes, but decides it safer behind the tank!
The tank gets a 2 (Its still at +2 as above) and advances half speed, this allows it to fire its main gun! (It is already loaded)

The shot is at short range, and gets a hit (12 on a D20)
Each member of the fire team dices against a hit. A 75mm hit rolls a D8, -1 for the Germans being in cover. (The dice are placed next to the results in the picture below)

This is backed up by the 4 aimed shots from the Fire team in the field! (They get a kill on the guy killed by the shell, and 2 more suppressions)

The Germans Risk Factor is now 9 (1 for each of the 5 10% dead/wounded, 2 for being shot at an AFV, and 1 each for being shot at, and losing a firefight.
Their rolled 4 gives a 'Withdraw further from nearest enemy' which they do even though suppressed.
Suppression never stops compulsory moves!

The German markers on the raised ground further back are within 20" and now spot the infantry and the Tank (which is in the open!)
One of the markers is a group of 3 riflemen - and a Panzerschreck team!


We have a house rule, that single shot weapons only fire if within medium range, so the dual armed rifleman uses his Rifle and not his Panzerfaust.
The Panzerschreck has no such problems.....

...and scores a hit on the Sherman!

The hit is diced on the Vs Vehicles hit chart - and blows a track off!

The infantry suffer no loss from the riflemen.

The next turn the crew abandoned the tank, and my infantry decided to leave with them, I didn't fancy my chances without the tank!
I hope this adequately describes the system in action. Please feel free to contact me if you have any questions!
The rules are available to download at: http://tynesidewargames.co.uk/downloads.html just look for the WW2 Skirmish Rules.
I will do another post showing how to do the solo system variant used in my other rules shortly!
No comments:
Post a Comment