Welcome!

Welcome to the Blog of a Skirmish wargamer! I hope you enjoy reading it!


All my rule sets are freely downloadable from our club website's Downloads page


If you need to contact me my E-Mail address is richardbradley5@gmail.com


Saturday 20 December 2014

Savage Swans do BTLB2

Today, we had our last club game before Christmas and the New Year. We decided to do a Beneath the Lily Banners game, and welcomed Andy Mcmaster to the game. He does Imagi-Nations with such well known personalities in wargaming such as Henry Hyde! Although some of the troops he used were not entirely covered by BTLB, he used his 'Savage Swans' together with some Alte Fritzburg allies. He fought alongside my Franco-Bavarians, our opponents being Ian's Austrians and Lawrence's British.

The Swans, on our right flank.With only light horse and Dragoons supporting his infantry, would he cope with the Austrians? (For more on this side of the battle, please go to Andy's blog: Another Slight Diversion)
 The Alte Fritzburg infantry (in Green)
Opposite, Ian's Austrians.No lack of heavy cavalry here! 
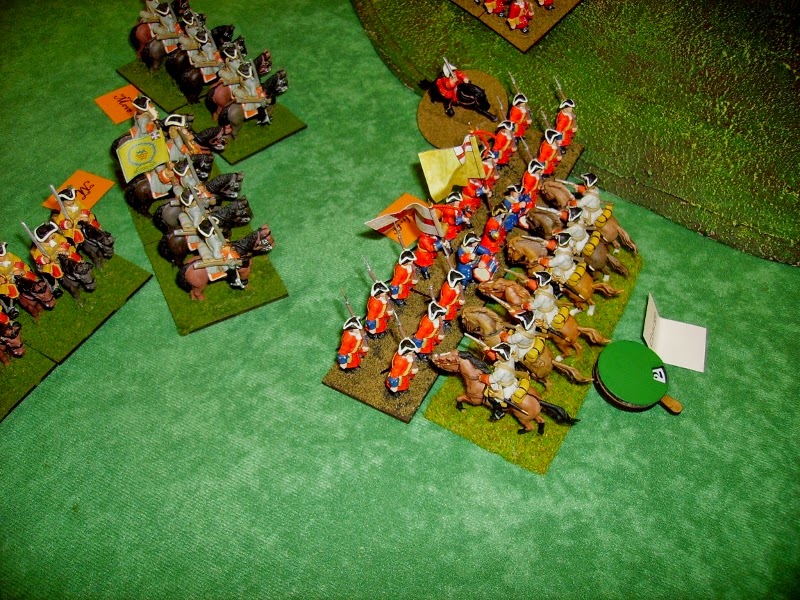
 On the Swan's left, my French, supported by a Bavarian Cavalry brigade.
Lawrence had some good Danish horse opposite mine. 
His 3 British battalions on their left. 
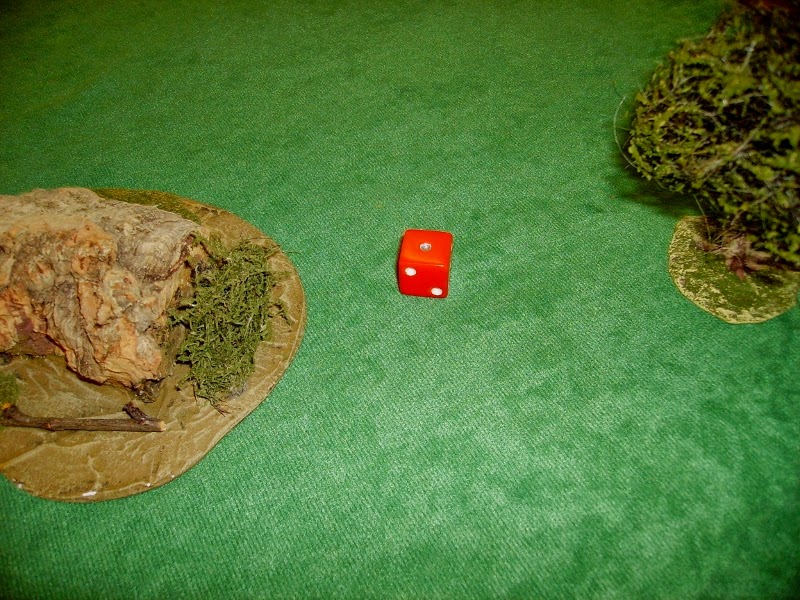
 On the first turn, I threw a '1' on my D10, meaning my men would not move this turn!
 The Swans were luckier, and decided to advance their infantry while putting their lance armed light horse on their right.
 My Bavarian field gun fired, it was all I could do!
 The Danish Kuirassiers were not impressed!
The British began to climb a steep hill overlooking my positions. 
 The Swans sent their Dragoons to support their light infantry...
 An Austrian Kuirassier brigade was bearing down on them!
 My men finally got moving on turn 2.
Even my French infantry! -  The Bavarian gun now had the range...
 A squadron of Danish Kuirassiers was hit and retreated to the rear.
 The rest of the Danish horse supported the Welch fusiliers.
 These, being in column, were charged by a squadron of french regiment Cosse, but drove them off with fire.
 The French horse retired to safety.
 The Welsh now formed out into line.
 The French squadron charged again, and got into contact, the ragged volley of defensive fire missed!
 Another Cosse squadron, and a Danish Guard cavalry squadron charged each other.
 The remaining Danish Kuirassier squadron and my Bavarian regiment D'Arco refused to charge, and just glowered at each other!
 Meanwhile..The Swans' light infantry retreated from the advancing Austrians.
The Austrians cavalry broke one of the Swans' dragoon squadrons...but the second dragoon squadron attacked them as they pursued. 
 Amazingly, Regiment Cosse beat the Danish Guards! - the squadron which had charged the Welch fusiliers were destroyed, however.
 These retired, not to fight again today!
 Back with the Swans, the dragoons beat the Austrian Kuirassiers and an Alte Fritzburg battalion shot down another Austrian squadron, which fell back.
The Austrian infantry now advanced. 
 The elite Swan infantry moved to extend the Alte Fritzburg line to face them.
Gotta love that winged mascot! 
I finally got my dragoons to dismount to try to stem the British advance 
 Regiment D'Arco finally charged!
They beat the Danes, who retreated, badly cut up. 
 The second squadron of Danish Guards now chased off another French squadron, but then got shot to pieces by Regiment Irlandoise du Dillon
 The Swans light lancers broke another Austrian Kuirassier squadron.
 But, they were now faced with a fresh, elite, Austrian Kuirassier brigade, while they were blown.
 The Austrian infantry was winning a firefight with the Alte Fritzburg infantry.

So, as the game ended, it was clear the Austrians had beaten the Swans, and even though my cavalry had, more or less, beaten the Danish cavalry, the British and Danish infantry remained.
It was a close game, and, (probably?) - an Austrian victory (sigh!).

Saturday 13 December 2014

Valhalla - our first try out

Today, true to my promise at Battleground, we did a try our of Valhalla.
It is a very easy to understand set of rules which, we discovered, had levels that needed to be understood regarding command and control not immediately apparent!
It really needs some time on a computer to upload pictures of your soldiers and create a warband.
Not having done this, we used the precalculated figures available from East street games website, where you can also freely download a PDF of the rules.

So, rules read and warbands downloaded, we started the trial game!


The battlefield we would fight over. 
 These are the standard Viking sheets. The warband is divided up into 'Benches' - of 4-8 figures who fight together in the game. 
 I found one error in the Saxon charts! - an amazingly tough  peasant archer we nicknamed 'Conan the Bowman', I made him less tough for the game.
Having no Saxons, my Normans had to fill in!
 Vikings...we had!
 We decided to test the game in a straight fight across the table, rather than working out a scenario. We started stationary, and came to regret it!
My first move saw my warleader order the other warband to take and hold the hill in the middle of the table...Success!
Lawrence, leading the Vikings, had less luck, scoring a 1 - which allowed the Saxons to order his other warband to go to the table corner!!!

Aaagh! 
Next turn, I managed to get a 2 on my order to my own warband, which meant it fell back 6 inches.


  As with me, Lawrence got another 1 when he tried to get his errant warband back, and it completed its move to the corner!
 I, meanwhile, managed to get my men moving. Having spent 2 of my 3 actions doing this, I got left behind!
Next time, a 'follow me to that tree' might work better!
Ians Saxons had reached the hill they were ordered to 'Take and Hold', my men now moved to cover their flank.
 Lawrence sent his warleader closer to his men in the corner in the hope of getting them into position again!
However, his men had been ordered to follow him, so he ended up completely out of position!!!
Oh no, not again!
I tried to change my order to join Ian's band on the hill, but ended up falling back again!! 
Lawrence finally succeeded in getting  his lost men behind a rock!
 I got alongside Ians men on the hill, just in time! 
Lawrence had his men behind the rock run towards Ian's men on the hill. 
 Ignoring the shooting from Ian's archer, Lawrence moved a warrior into combat!
 He lost the opposed 'Skill' rolls by 1 and took Ians warriors Strength + D6 - a total of 12 damage!
 Another warrior attacked! 
Another loss, but only 6 damage suffered. 
This continued, the Saxons only lost one combat, but most of the Vikings were hurt, some very badly. 
 In the Saxon move, they had 3 attacks each. As the Vikings were already hurt, they lost a man dead first melee.
Ian used the archers second action to move on the flank of the next Viking. 
 The 2 Saxons quickly killed the next Viking!
 Repeating the same tactic as before, the swordsman went on the flank of the next Viking.
In another melee action, the third Viking died. 
 Ian had some very good dice today!
The fourth Viking fought hard, but finally died too! - this melee is brutal!
 The surviving Viking took a morale check and retreated. Lawrence's command dice meant the other Vikings also fell back!
The game ended! The devastating and rapid defeat of the Vikings attacking the hill decided the day.

I think we all learnt a lot about how the game worked today. I think a lot of odd things happened due to odd dicing!
I am not surprised a lot of people like this game!

After, we tried 'Battle Troll' - an odd game! - it is one I think we could play as part of an occasional campaign.
I managed to kill 2 of my 3 enemies, only taking a couple of wounds, but lost the battle as my dead opponents managed to gain Reputation from Insulting me and dying gloriously!