Welcome!

Welcome to the Blog of a Skirmish wargamer! I hope you enjoy reading it!


All my rule sets are freely downloadable from our club website's Downloads page


If you need to contact me my E-Mail address is richardbradley5@gmail.com


Saturday 12 April 2014

A hot day in Ol' Arizona

Today we did a skirmish based in the 'Old West'. As we had not planned a specific scenario, we just had our guys and some townies defending a small town against an Apache war-party.
Each of the 3 players, Lawrence, Phil and I, had a leader figure, with 2 henchmen of, lets say, rather poorer quality!

Lawrence started on 'bootleg hill' -looking at his previous victims apparently!-- he had a good ranch hand with a rifle, and an ex-army Apache scout as his henchmen.
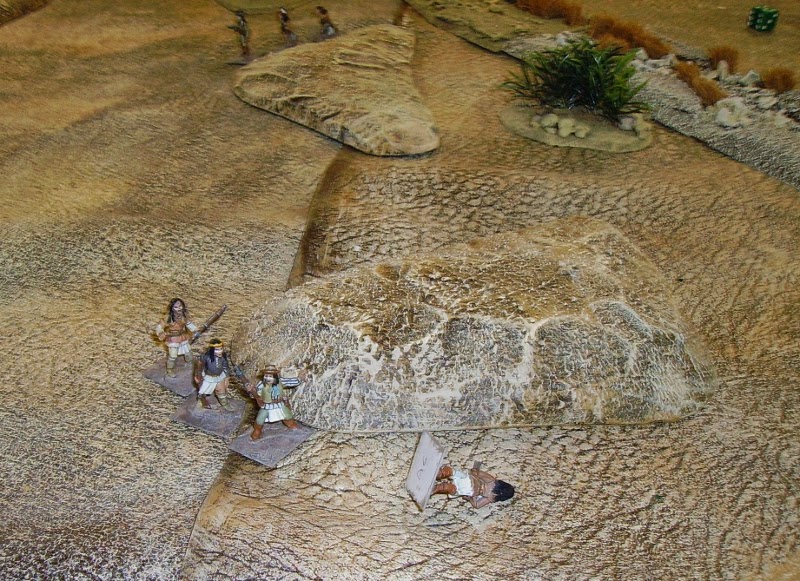
 I started next to the church, I had a pistol, my 2 low-life companions had repeating rifles.
Phil started in the centre of town with his little band of cowboys! 
The Apaches arrived from the south. 
Most were dismounted, the War-leader with 5 companions remained mounted.
Unaware their approach had been observed, the raiders advanced without much caution. 
 In town, Lawrence's men went wide on the right, obviously hoping to outflank and 'Bushwhack' the Indians. 
 My men advanced past the 'locals' to set up in the dry river bed.
Phil, himself, set up in a wagon, his henchmen in the surrounding buildings. The Apaches reached a rise, overlooking the town, but saw nothing. 
Lawrence saw some other Apaches on the flank, he opened fire.  
One of the Apaches fell, gut-shot. 
 The other 3 leapt back into cover.
Lawrence then fired at another group... 
 One of the Apache's scouts fell with a big hole in his head.
 In town, Phil had been forced to leave his wagon after a good shot from his flank grazed his head, one of his henchmen with a 'trap-door' Minie rifle fired to cover his retreat...
 One of the leader's mounted braves was shot through the chest.
 The Apaches began an attack on the town, shooting back at Phil's man in the livery stables. 
 My men fired at the horsemen attacking the town.
 Phil's man and mine killed a horse each, but the Apaches were brave men and continued to attack!
 The horsemen entered town where the Sheriff and deputy fired at the Indians, who though surprised, shot back. The Sheriff fell with an arrow through his head.  
My men were still engaged shooting at groups of Apaches as they appeared. 
 One of the Indians shooting at Phil slumped down head-shot.
Back in town, the Apaches rode at the brave deputy with lances. 
 The battle was brief, the deputy slumped to the ground with a lance wound in the stomach.
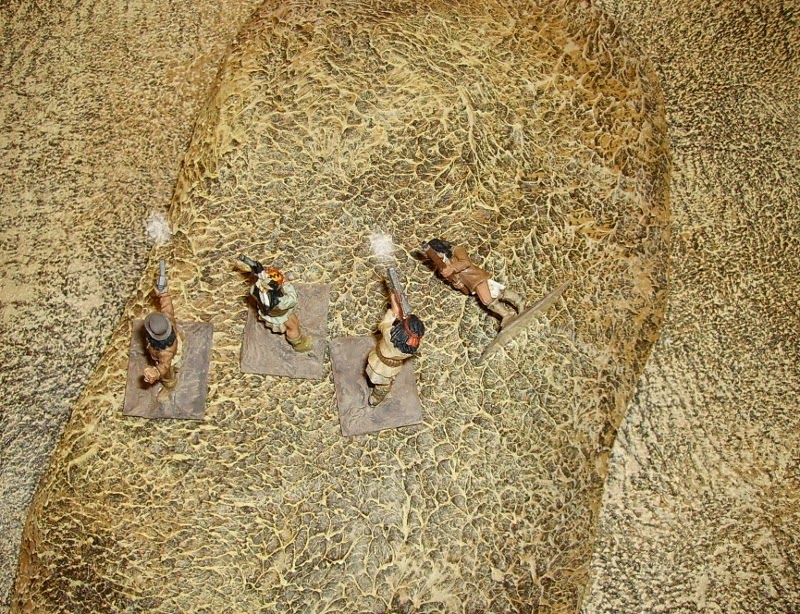
 My henchmen decided to move behind some bushes, leaving me to face 2 Apaches. I 'fanned' my pistol and one of my attackers fell, hit in the chest.
Fire erupted as Phil and one of his men fire from the rear of the livery, as the mounted Apaches attacked the saloon. 
The townsfolk appeared, and soon the Apaches were surrounded. 
 The 2 Indians attacking the saloon were quickly killed, but 2 others remained, trying to work round the side of it.
 Lawrence's men, meanwhile, had bumped into a small group of Apaches and had a short range fire-fight. Despite the range, only Lawrences Indian died!
 The Apaches, despite having the advantage, retreated as Lawrence 'fanned' his pistol at them!
The other Apaches also ran, and headed home.
Obviously, the War-leader had fallen in front of the saloon, and his war-band decided there was no advantage in staying to fight. The battle was over!

Gonna need a new Sheriff though!

Sunday 6 April 2014

1915 Russians vs Central Powers

Today, we did a WW1 Spearhead game with a couple of new players (Dave O and Craig) taking part. Lawrence wasn't in it as he was under the weather. I too was not 100%, but agreed to command the Russian left.
The scenario was a small Austrian force holding a railway junction, being attacked by the Russians, and a supporting force of Austro-Germans moving to support the junction defenders.


The rail junction, supported by troops in trenches.
I commanded a Division, 2 brigades of Cossacks and a supporting infantry regiment. my horse had 2 guns in support and the infantry had 3 guns. 
Ian held the centre, with 2 infantry regiments. 
Phil held the Russian right, an Infantry regiment with a battery of 3 guns in support, followed by a brigade of Russian cavalry. 
Facing my Russian left, Dave O  led 2 Austrian cavalry brigades, with their own artillery in support.
Dave (the hat!) led the German left, a Cavalry brigade and supporting Jäger and artillery...  
...he also had an Infantry regiment in support. Craig held an Infantry brigade behind the rail junction and Dave O's cavalry.
My first move was to advance towards the Austrian horse.
Ian's force of infantry also advanced on the Rail junction.
 Phil also advanced.
Both Austro-German wings attacked with cavalry. 
The Austrians in the trenches facing me opened fire. 
Despite the range, they managed to destroy 2 companies of my Cossacks!
 The Austrian cavalry attacked my cavalry's artillery. 
I countered by attacking their flank while my machine guns fired at their front. 
 My cavalry also attacked the other Austrian regiment.Supported with fire from Craig's German infantry, I failed to make headway, and my first brigade broke.
Phil on the Russian right was by now heavily engaged with their German opposite numbers
 Dave O, Craig, Dave (the hat) Phil and Ian.
Having lost a cavalry brigade, my second , supported by my infantry, began to win against the Austrian horse. Ian's infantry began to assault the junction.
(An overview from the German side)
 A regiment from the second Austrian cavalry brigade attacked my infantry, and were effectively wiped out.
The battle was hotting up at the junction, Ian's Russians desperately assaulting the village, supported by Phil. The Germans were fighting equally hard to stop them!
On Phil's wing, Dave T.H. was starting to tear holes in the Russian infantry. 
On my wing, things were going better, as the first Austrian cavalry brigade, including their artillery and machine guns, broke and ran.
I now had a chance! - if I acted quickly, I could use my infantry regiment and my remaining cavalry brigade to break the remaining Austrians!
Ian had managed to break into the town, but the Austrian infantry counter attacked and broke the Russian regiment.
With the appearance of Germans from their right. 

Phil's brave Russians broke and ran.

On my wing, however, assaulted by my entire division, the last of the Austrian cavalry was defeated, leaving Craig with no flank protection for his German infantry.
With most of Phil's flank now in flight, the Germans began to outflank the Russians attacking the town.
Ian had his second regiment ready to attack, with the remaining infantry from Phil's force.
Ian (centre in picture) now saw no chance remained to take the junction.
The battle was conceded, and the Russians withdrew from the field.


It had been a very hard fought game, and I think everyone quite enjoyed it!
That is why we play wargames, isn't it, after all!