Hi all!
I finally felt confident enough about my newest set of rules to give them a try!
Having a lot of figures from 'Imperial Assault' - but not being enamored with the rules, I wanted to write a set of tabletop skirmish rules so I could use these lovely figures!
So, giving myself an easy scenario to play, I set up a game!
The Scenario:
Ahsoka Tano, better known in the outer rim as 'Fulcrum' has been sent by Senator Bail Organa to steal information from a remote Imperial communication relay base on the 3rd moon of Steera.
To avoid the extensive sensor array around the Steeran system, only a specially stealth equipped shuttle is provided able to carry 10 men at most-- One only hopes the Empire hasn't provided a strong garrison!
Setting down a couple of clicks away from their target, Ahsoka, R2D2, and half a dozen troopers, all that could be spared, cautiously approach the base...
A rough track leading to the installation.

Ahsoka didn't want to tempt fate by marching up the track, despite Artoo's scans showing only a few life forms, the Clone Wars had taught her caution.

The installation, the target is the building on the right. The small black counters are portals, which are possible entry positions for enemy figures.

Other portals are placed with as good a line of site on the table as possible.

Artoo, Ahsoka and the troopers.

Only one portal can see them, which means there is no chance of meeting any hostiles, unless they are alerted to the Rebels presence.

Although Ahsoka is close enough to command the troopers, they automatically choose the right course of action!

The Rebels decide to sneak round the trees, where there are less portals.

As the rules indicate, the more portals that can see you, the more--and worse things you can meet!

Still only the one portal can see us.

There is no avoiding the portal on the hill to their front though!

As the other portal is now out of sight, only the one ahead can see them.

One section moves forward towards the portal...

...once within 8" of the troopers, it retreats up to 12" to the next piece of cover, still in sight of the troopers (though they are still hidden by the hill here).

Unfortunately, even on the back of the hill, there are portals able to see them from the other side of the road.

The troopers would be unwise to sit there, as each turn, the enemy rolls a dice, and sooner or later a high score, and some enemy figures, would appear.

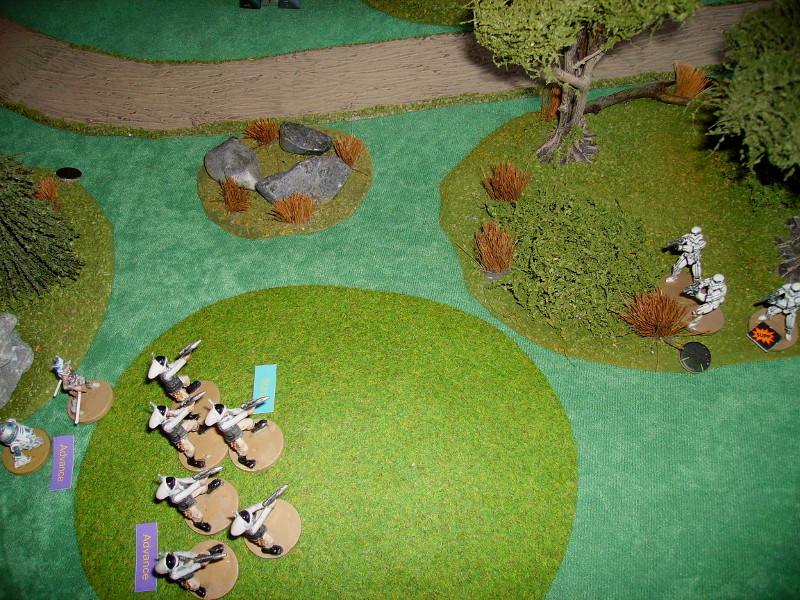
As they reach the top of the hill, the portal ahead activates, and a fire fight ensues! Fortunately - the 3 men in the front squad are not hit!

As can be seen from the chart, a 7, or 8 would have been needed.

The 4 Stormtroopers get 2 hits from the plucky rebels...

2 'Duck backs', sort of a Suppression. It means they cannot shoot in the next turn, and as hey are in cover, cannot be hit themselves.

The first squad stands, while the next moves up in support.
The Stormies make one of the rebels duck, but the heavy Rebel fire is Ducking the Imperials more often. Neither side is hitting though!

As the Stormies recover from their suppression, each turn, the portal is dicing to see if they get reinforced!

To break the impasse, Ahsoka moves forward...

The Stormtrooper's fire isn't even close!

I had saved Ahsoka's Force action to deflect any hit back at the 'Bucket Heads' as well!

Another duff D6 roll for Imperial reinforcements!

Ahsoka orders the troopers to outflank the Imperial position, while she prepares...

...to Force jump into the enemy position!


With one 'Ducked' and 2 in melee, only one Stormtrooper can engage in shooting, and only has a clear shot at the nearside troopers.

A fire fight ensues...

...the Stormtrooper falls!

Ahsoka makes short work of the 2 Stormtroopers she is facing!

The last one decides he is rather...overfaced! - he retreats to the crates behind!

Ahsoka does not need to use the force here, she simply runs!

'Surrender, Rebel scum!'

Zgwinggg!

'Not likely!'

Ahsoka gets on the com-link, and R2D2 jets over to the panel, and plugs in.
'Do your stuff, Artooee!'

The troopers stay behind, keeping out of sight of the other portals...
...and cover Ahsoka and the droid as they retire with the vital info!

So, how did it go?
I am fairly happy that basic troopers and Stormtroopers can fire all day if in cover and only rarely hit anything! Jedi are rather good!
The rules needed a couple of slight clarifications which came out in this playtest.
I will get my friends to help next time, so I get some outside - and less partizan, opinions on the systems it uses!


